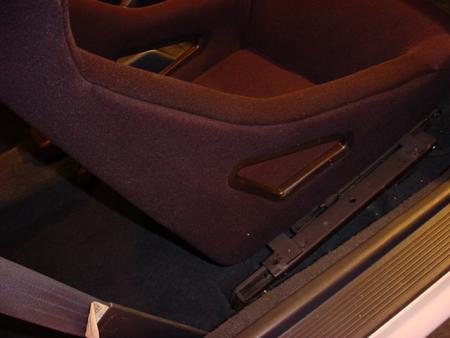
I got a good deal on some Sparco seats from a local place, but couldn’t believe how expensive the Sparco brackets are. So I set off with some tools and material and decided to build my own. (The seats I got are BOTTOM ONLY MOUNT) For anyone else poor like me
:roll: that wanted to do these seats but didn’t want to pay huge cash for brackets, here you go.
-
Material: 4 strips of steel about 1/8 thick and 1 to 1-1/2 inches wide and at least 19 inches long. Electric drill. Pilot bit and 1/2" bit. Teck (tapping) screws.
Hacksaw. Screwdrivers, Ratchet set. 8 - M8 bolts - Sparco doesn’t supply them :rant: -
Remove stock seats and unbolt the tracks from the seats. They spring a bit when you unbolt the last bolt so be ready for it.
-
Sounds easy enough… Remove all bracketry from rails, so you are left with a flat surface on the top of it. There is one longish piece at the back and a short one at the front. You can grind the rivets off, or drill them as I did. After you grind/drill them off, rock the piece back and forth forcefully, and you will see the outlines of two more (presumably riveted from the other side), drill these out as well to remove the bracket piece from the rails. There is a small circular piece at the front that is raised 1/8" or so from the rails - I left this piece on but you could grind it off.
-
Install the tracks in the car and measure from the outside edge to outside edge. This measurement will be 19 inches. Cut four pieces of steel 19" long. Now, turn the Sparco seat upside down. Make marks 2.75" in from the end of each steel piece. These will be alignment marks for finding the centre of the holes you drill in the steel pieces. Hold the steel piece up against the seat and mark the exact centres of the holes (using the 2.75" marks for left-right alignment) Do this for all of them and drill all eight holes.
-
Have a beer! This is hard work!

-
Bolt the now-drilled steel pieces to the bottom of the seats. They should fit easily and bolt up smoothly.
-
Put the seat (which has the steel pieces bolted to the bottom) on the tracks which are still in the car.
You will find there is a little raised part maybe an inch and a half long at the back of the rail - use the front of it as an easy way to get the seat in the right spot by placing the back of the rear steel crosspiece up against it - no need to measure that way
-
If you can weld on site, you are lucky. C-clamp the metal pieces to the rails firmly, remove the rails from the car, remove the seat from the steel pieces and weld. If you have to weld off site, teck screw the steel pieces to the rails, then remove the rails and seat, and then have the assembly welded.
8B) NOTE I did this step so you don’t have to: :rant:
The seat rails DO NOT sit exactly parallel to each other and perpendicular to the steel pieces. MARK THE RELATIONSHIP CAREFULLY before you weld. Because I assumed they were parallel, I had to slightly alter two of my seat bolt holes.
-
Paint! After all welding is done, give the rails a paint job to hide the work you did on them. I went with matte black - it looks sort of camo and doesn’t draw attention to the rails. If you had to use screws to hold the steel to the rails be sure to remove them.
-
Now just bolt the seat into your car (have the seat mounted on the rails befroe you do this - trust me).
You’re done! The seats will slide back and forth on the rails just like a stock seat. Because Sparco’s are such tall seats, you will be glad you made your own brackets…you will be sitting lower than if you had bought the fancy dancy Sparco ones. ![]()
http://www.imagestation.com/album/pictures.html?id=4291323497