Gen 2 Manual Rack swap
Supplies needed
Manual Rack (CRX used in this write up all EF Civic and CRX racks will work)
EF Civic Rack bushing
DA power steering rack bushing
DA Inner Tie Rods
DA Outer Tie Rods
1X M10 1.25 x 60mm bolts Grade 10.9
2X M10 1.25 x 25mm bolts (or 30 if using lock washers) Grade 10.9
4X Lock Washers (10mm)
4X 3/8 Wide Washers (sometimes called fender washers)
2X 10mm washers
Tools Needed
10 12 14 17 19mm Assorted wrenches and sockets
Torque Wrench ( Bushing side: 28 Ft lbs Shim Side 32 Ft lbs)
Inner Tie Rod Tool (30 or 40 bucks at harbor freight or rent from auto parts store)
Grease
Sand Paper (optional)
Paint (optional)
I’m not going to cover the removal of power steering rack nor am I going to show the inner tie rod install as I’m focusing on the manual rack itself, tie rods have been well covered and are honestly pretty straight forward; I will however detail there installation in the text. MEASURE YOUR OUTER TIE RODS IN RELATION TO YOUR INNERS BEFORE YOU REMOVE THEM!!! This simple step can help in avoiding headaches with alignment later on.
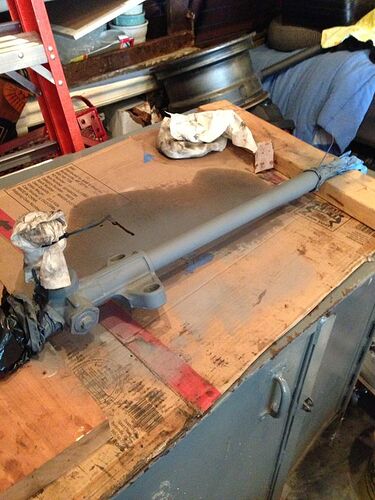
I listed the paint and grease because anytime you are working with a twenty-year-old manual rack its best to give it a good overhaul before placing it on your vehicle. I tore mine down and re-greased all the gears and then preceded to paint it, here it is after grease and a couple coats of primer.
I installed my inner tie rods into the rack after I installed it onto the vehicle but honestly its up to you, without them on you have more room to maneuver the rack onto the vehicle and hook up the steering column.
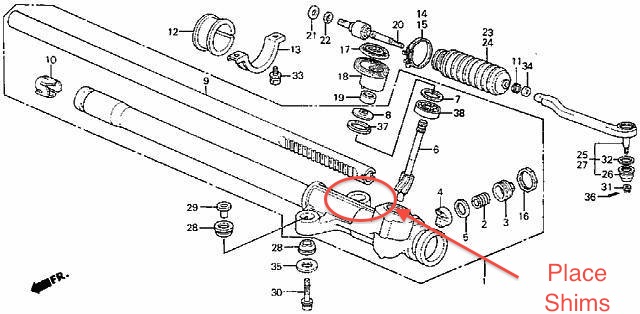
Now when installing the rack the M10 1.25 X 60mm bolt you purchased will be used on the side with the 3/8 washers that are acting as a spacer. The DA power steering rack sits at a different angle than its manual counterpart so I measured the difference and it came out to roughly .23” but generally a .25 of an inch will be fine for the application. Place the washers on the non-bushing side of the rack, in between the rack and body of the car. They are placed on the bolt closest to the rear of the car. I couldnt get a good picture of the bolt because I put the shield for the PS back over the manual rack but measure your washers, your looking to get a shim size between .23 and .25, I ended up using three washers but you may have to adjust depending on the thickness of your washers.
Now working to the other end we take the EF bushing and place it inside the DA bushing. A note here, I actually pulled a bushing from a wagovan and it was the same size as the DA bushing but with some diligence I was able to trim it down. Essentially you are trying to get the inner bushing completely around the rack, the DA simply interfaces with the C-bracket that bolts to the body. The key is to get a good snug fit, there is no play on the bushing side once I tightened them to spec.
Once the rack is on the car you can proceed to install your inner and outer tie rods and tighten things up. I used loc-tite on my fasteners just to be sure but with lock washers as well it may be overkill but o well.
Install your inner tie rods and be sure to orient your lock washer properly if you are using that type of inner tie rod ( the ears should be facing the rack when tightening, it has provisions on the end of the rack so make sure they align before you torque.
Enjoy the manual rack :ohyeah::ohyeah:

