good write up, the second one seems the much more esier way of doing it
but if u do it the first way the plates are further and sit flat so no shimming
yeh why has one guy got it up side down looking and the other isn’t
good write up, the second one seems the much more esier way of doing it
but if u do it the first way the plates are further and sit flat so no shimming
yeh why has one guy got it up side down looking and the other isn’t
I use mine for auto-x, have big plans for road course racing.
I know it was a pain removing the gas tank but it went some what quick. We took it out so we could get the holes a 100% even and we put the plates on each side.
bad ass install man, tight. very well done.
can you please help explain to me where the fasteners that hold the rear seat in are? I have looked and blindly felt, but no such luck. i know i may sound dumb here and it is something really simple, but I can’t figure it out right now, so please help out a fellow G2-tuner?
They are in the front, I can’t remember right off how to get them out. Just pull up then pull towords the front of the car. I could be wrong but I think thats how they pop out.
have there been any tear out issues after some track or a/x mileage?
looking for a sway bar solution for my race car.
What parts needed to be ordered besides the bar? Were any of the parts reused from the original sway bar? Did you use OEM bushings or Energy/Prothane?
Link to ITR suspension:

http://www.ahfmotorsports.com/ Call this place they will give you every thing you need for under $130.
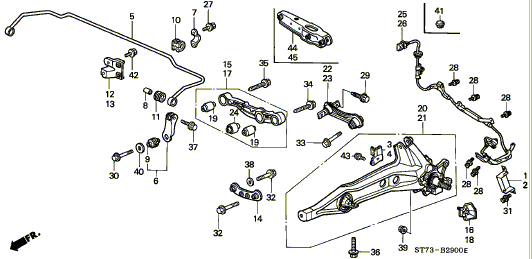
nedd 30 x2, 40 x2, 6 x2, 37 x2, 8 x2, 11 x2, 37 x2, 12, and 13.
But call or email ahfmotorsporrts
Is there an aftermarket mounting brace you can buy to make a 23mm 98spec ITR rear sway to work?
can u give a parts list of whats needed for this upgrade? and where to get them
I made the same mod today and thought I’d add my experiences to the already good write ups done above. It all helps for the next person ![]()
Sorry for the shitty phone pics BTW.
Hardware:
2x M8 x 120 Hex Headed Bolts, or a metre of M8 thread hacksawed to 120mm
lengths.
2x M6 x 30mm Hex Headed Bolts
4x M8 hex nuts and 4x M8 Nylocks
2x 8mm by 40mm Repair Washers (big flat washers)
10 pack of normal 8mm flat washers
2x M6 flat washer
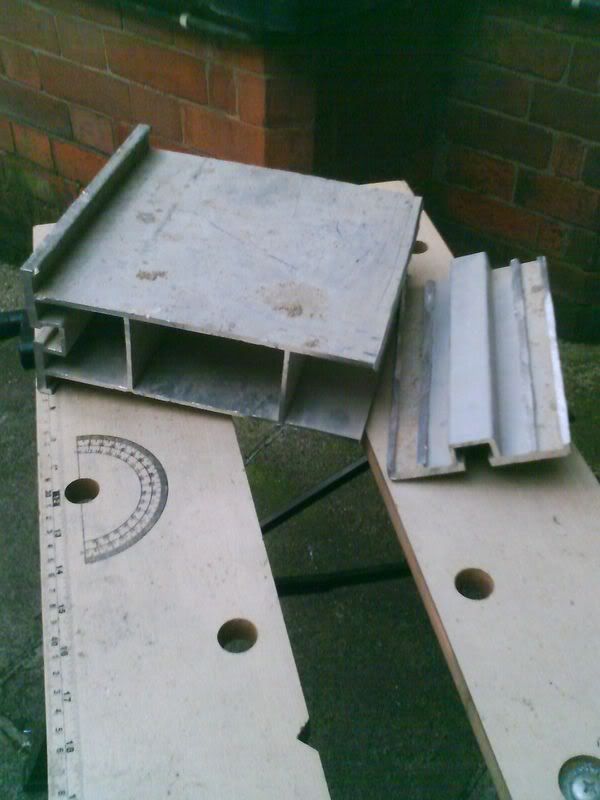
1st i made four shims up from some scrap extruded aluminium using a cutting/grinding disk:

The shims were 1/4" thick, 1" x 3.5" with the bolt holes drilled 2.625 apart (got the shim measurement from a kit for the DC here > http://geocities.com/bretq/swaybar_install.html - our cars need much thicker shims though). If i were to make them again, I’d also round the corners off one corner to help with re-locating the ABS brackets afterwards. After the guide holes were drilled I used an 8mm drill.

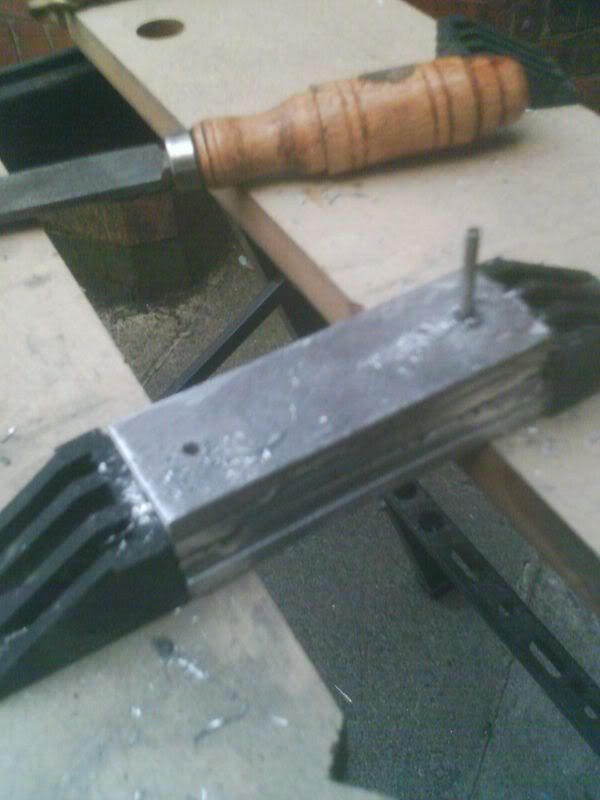
whilst there I cut/ground out some spacers, as i wasn’t sure how the shims would sit.
http://img.photobucket.com/albums/v77/boma23/ITR%20ARB%20install/IMAGE_00038.jpg
http://img.photobucket.com/albums/v77/boma23/ITR%20ARB%20install/IMAGE_00039.jpg
http://img.photobucket.com/albums/v77/boma23/ITR%20ARB%20install/IMAGE_00040.jpg
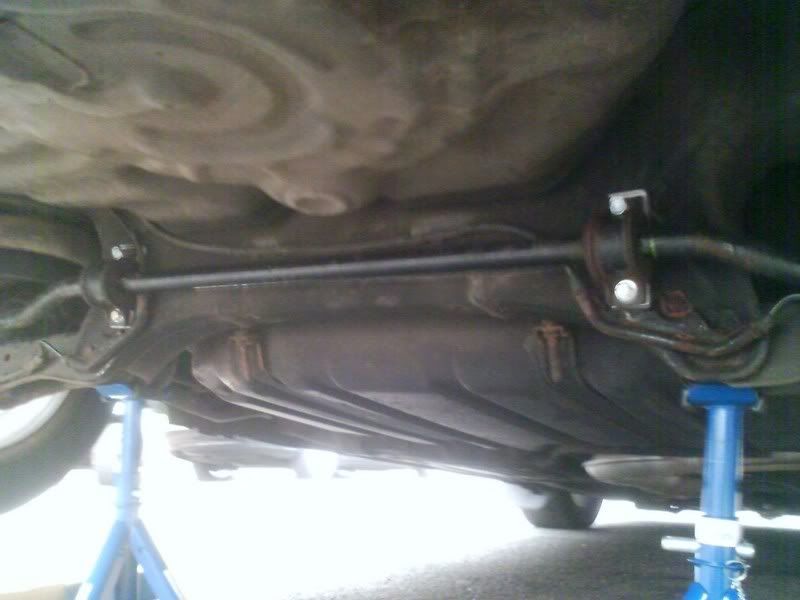
I jacked the car and stuck it on axle stands, then removed the rear box and old sway bar (although i left the L-brackets there in case i messed something up - the bolts looked like they’d snap before they’d come loose). Then the ABS brackets came off. I didn’t see the need to remove the gas tank either, whilst a little but fiddly my car had enough room to get my hands in behind the subframe from the side.
I decided to use the existing threaded inboard ABS bracket mounts, rather than drill them out and tap them, so next I used the M6 x 30mm bolts to hold the shims against the body, line them up vertically and then use the top bolt holes as guides to drill the subframe. You’ll need a long bit to get through the far side of the subframe. I deliberately used a 7mm bit and then tapped the holes using the M8 bolts and a socket, to help reduce movement.
Next I bolted the new ITR sway’s endlinks into the LCAs, and then after some examination of what was going to sit best, ended up using 2 big plate shims on each side, and only washers, with none of the little round spacers I made. Oh well ![]()
At this point I discovered the M8 100mm bolts I’d bought were too short, and went off for a near 2hr bike ride round the local hardware stores trying to find longer ones - in the end my only option was a metre of M8 thread.
I cut this into 2x 120mm lengths, and used 1x std and 1x nylock together as a locknut to create a head on the 2 lengths.
I found the best seating was:
top bolt
bolt (now a 120mm lengtrh of thread with locknut) > M8 washer > D-bracket > 2x 1/4" thick shims > Subframe > REPAIR WASHER > hex nut & nylock nut as locknut.
I think its important to mention here that the subframe wall thickness is THIN. Make sure you use the big repair washer on the other sid of the subframe to spread the tension across a big area. Also do not tighten it too hard as the subframe wil flex inwards - instead tighten it slightly so it’s fixed firmly & there’s no movement, then use the locknut to prevent it coming loose.
bottom bolt
M6 bolt > M6 washer > M8 washer > D-bracket > M8 washer > 2x 1/4" shims > M8 washer > Subframe
Careful not to overtighten this one and strip the thread.
Next, (if you have ABS) you’ll need to do some nifty one handed grinding, to hold the ARB brackets with some pliers or grips, and then carefully remove lots of material where the old inner bolt used to go though. Try not to grind through the ABS lines :worry: This will allow you to re-mount them, angled down, using just the old outer bolts.
And you’re done:

The final part is bolting up the droplinks to the LCA. My ITR bar came with droplinks, and the DA6 LCA is v. similar to the ITR LCA.
For US spec DAs, you may need either the ITR LCAs as well, or an aftermarket LCA with mounting points to suit the ITR bar. Without having seen a US spec LCA, I can’t say for sure.
As well documented, this will make a HUGE diffreence to your car’s handling. I went straight out and did a little mix of stuff - the car felt much more stable & less twitchy at high speed (something i WASN’'T expecting given that it was being tuned for more oversteer). For quick back roads (3rd gear corners) the car was awesome - not only was roll markedly less, but the car felt much better balanced front to back, and flooring it through those turns the car just pulled itself out with no hint of understeer or needing to back off. I’m a happy man, looking forward to my next trackday now :burnout:
I plan to do this to my new teg in the next month or so.
Yes, hella old post but I’m wanting some more pics and/or writeups. Anyone???
isn’t the stock sway bars hollow and itr’s solid
supposely all oem sways are hollow…
i plan on doing this mod eventualy. when i drop my tank i will be doing a walbro pump aswell and i woudlnt mid getting the Blox lower control arms with the Blox sepherical endlinks. i went pricing on JHPusa.com and im looking at a little over $400 for everything.
the only thing bad about putting a dc2 sway bar on a DA that it will rip the subframe…
if the metal plates are used to support the subframe, you should be fine. Unless you are hardcore drifting ![]()
im pretty sure the ppl who have had their subframe torn didnt have the metal brackets or installed it incorrectly.
mine’s been on for 18 months now, no ripping or tearing in evidence, and my car does get used on track days on bumpy british circuits, and then beaten to within an inch of it’s life over the back roads in the mountains of Wales on a regular basis (if anyone reads “Evo” magazine, they’ll know the sort of roads I’m on about).
I do have pretty high rate rear springs though (400lb), so tearing might be an issues with standard or much softer rates, bit people on these rate might not be as bothered with the conversion.
for the bloke asking for more write ups - what more do you want? lol
if you can’t work it out from everything’s that’s been posted on the last 2 pages, then you probably shouldn’t be taking it on…
The part that is unclear from the pics/instructions are the endlinks. I don’t really see anything about hooking those up. I’m sure if I was able to jack up my car and take a look it would be cake but I can’t at this time. So I’m just asking for some more pics/help on that. Everything else looks to be pretty straight forward.
need pics of endlinks here:
http://g2ic.com/forums/showthread.php?t=69545
Where is Ben Ogle anyway? i read this post a while ago and it is old.