As alluded to in another thread on this forum, my engine stopped running and the fault probably lies with a massive oil leak at 2 of the spark plug seals. While the car is in the service bay (aka my garage on stands), since I’ve already removed the valve cover AND since it’s been at least 10 years since the timing belt and water pump have been changed, seems prudent to do all this work before putting her back on the road. Before I start I just want to make sure I’ve got all necessary parts that require replacement.
List:
Timing Belt
Water Pump
AC belt, power steering pump belt & alternator belt (it’s been a while so why not?)
Cylinder head cover gasket
Spark plug seals
Camshaft end plugs
Distributor O ring
VTEC spool valve filter
Timing belt back cover rubber seal
Lower timing belt cover rubber seal
Water pump O ring (I think I need one of these? Also, where to buy from?)
Water pump connecting tube O ring (this was replaced 6 months ago should I replace it again?)
Do I need to replace the crankshaft pulley bolt?
On page 6-67 of the factory service manual there’s a tiny object called a “key”, looks almost like a dowel. What is that and what’s it do?
Did I miss anything? I’ve never done this before but do have a few friends that are going to guide and assist.
You shouldn’t need to replace the main pulley bolt. I recommend replacing the timing belt tensioner while you have it apart. The key is there to hold the main pulley / Harmonic dampener in place on the crank. The crank and the pulley have groves cut into them it is really self explanatory once you take it apart.
The problem that most have is removing the main pulley bolt . I believe it is torqued to 160 with oiled threads. I have the moroso crank pulley tool to hold it in place, and makes the job a lot easier.
Its nice to hear that you are using the factory manual, it also makes it easier!
Both engine mount bolts are too tight for me to be able to remove (so far). One bolt head faces upward, the other downward (and only accessible with a 12" socket extension - that the normal configuration?). Broke a 14mm deep socket last night trying to remove the lower bolt. Soaked them in PB Blaster then called it quits for the night. Assuming that doesn’t work, does anyone on this board know any tricks to help this situation? Basically asking if it’s common for the engine mount bolts to get stuck?:think:
Wondering if it’s time to finally pony up some cash for a motorized compact impact wrench…
That sounds like everything is normal but perhaps just a bit seized. The forward most fastener is a bolt which is only accessible from the below and threads directly into the mount. The rear most fastener is a nut which is accessible from the top, this nut threads onto a stud which should stay threaded into the metal bracket which bolts to the block. Occassionally when removing this rear fastener the entire stud will come out - not a huge problem though.
If you can’t get these off with a breaker bar + cheater bar then you’ll need to step up to a pneumatic or electric impact wrench. Harbor Freight has a pretty good line of inexpensive pneumatic impact wrenches if you have a compressor but aren’t looking to spend top dollar on an Ingersol, Snap-on…etc. I bought an HF one and am very happy with it. If you go that way don’t forget to look for coupons at www.hfqpdb.com
Still battling this @!#$*@#$%& stuck bolt! Been attacking it with a friend’s Makita 700 lb-ft rated impact driver. No luck thus far. Need a 10 inch socket extension to reach the bolt head, so that’s unfortunately handicapping the ability of the impact driver to work. Gonna buy a butane torch tonight and try a new approach.
Thanks Colin. A friend that’s heavier than me (and thus has more leverage) was able to get the bolt loose on the 22nd. I had started applying PB Blaster 2-3 times a day for several days, perhaps that helped. He got it loose with just my breaker bar. After removing the engine mount, saw that it was partially torn. So ordered another one of those, hehe.
What’s the best method for removing the crank pulley bolt? Impact driver isn’t getting it done, and if I put a breaker bar on it the engine starts to rotate (this while engine is in gear with a friend pushing down on brake pedal). Saw mention online elsewhere to use a strap or chain wrench.
There’s a crank pulley tool that is available, I think you may even be able to rent it from local autoparts stores. The only way I’ve been able to “strap” it is if the transmission is off so that you can chock the flywheel in place with a wrench.
As always, thanks. I’ll scope out the auto parts stores to see if any have it. Conveniently, I’ve got O’Reilly & Autozone within 1 mile of my house. And Lowes, Pep Boys & Advance Auto less than 4, hehe.
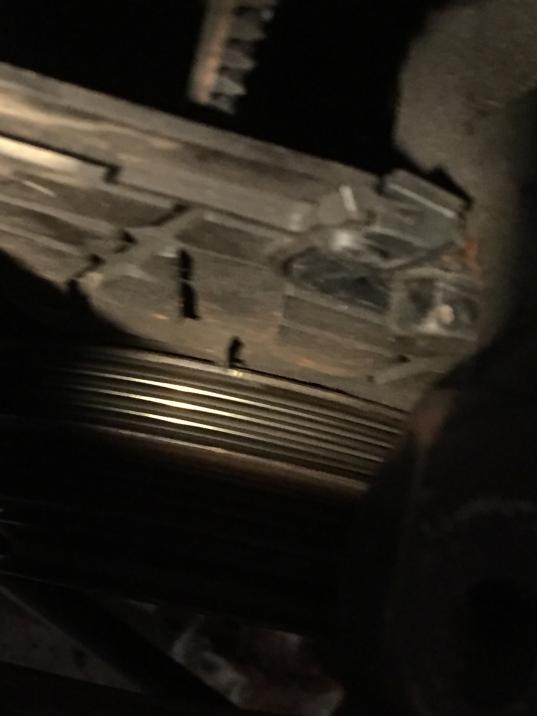
When I finally got everything off I noticed a little coolant corrosion by one of the lower water pump bolts. So that made me feel good about being proactive with this maintenance. I’ve run into a little trouble putting everything back together. I’ve installed the timing belt twice so far, and both times the crankshaft pulley is off ever so slightly, maybe a degree? It’s barely ahead of the notch. I know that I had it lined up perfectly before wresting to get the belt on so I’m guessing that it moved just a touch in the process. See below photos for reference to show the difference between the line on the lower timing belt cover and the notch on the pulley.
Two photos, each from a different angle. Is this variation okay? Or do I need to somehow account in advance for the slight movement of the crankshaft when wrestling the timing belt onto it? I’m done working on the car for today so I’m looking to this forum for help. Thanks in advance!
This is a tricky one for sure, I feel like pics are hard because there’s more “slop” in a timing belt job than I’d like and this makes it confusing. Basically it can often look a “little” off but still be OK. But usually you need to try and correct it to then see you were closer the first time around.
What I like to do is get the crank lined up as well as one of the cam gears (exhaust side if I remember correctly but it’s been a few years). I then lock that cam in place with a dowel, screwdriver…etc (if you didn’t know there are holes in the cams which allow you to lock them in place with the cam caps). It’s hard to get the belt right on the cams when they both want to rotate slightly but by locking one in place you only have to keep track of one. And, you can use a 14mm wrench/socket on the loose cam to rotate it a few degrees to help getting the belt lined up more easily.
When checking to make sure everything is lined up correctly make sure you only rotate the assembly one direction. If you miss your mark and then go backwards there is too much slop and it’ll look like things aren’t lined up even if they are. So, if you pass your mark, just rotate all the way around again.
Not sure if that’s helpful or not but I hope so. My guess is that you’re close enough or that the cams are a tooth or half tooth off. I like to always trust the crank, so instead of setting the cams to TDC and checking that the crank doesn’t line up, do the opposite. Set the crank to TDC and then see where the cams are, then adjust the cams if needed. And if you’re having trouble finding TDC I’ve found the old school “screwdriver in the cylinder” trick to be the most foolproof way to KNOW that you’re at TDC.
Lastly, one thing that can be confusing is that TDC for the cams is NOT vertical as in vertical to the ground, it’s vertical to the engine. The engine has a little tilt in it and doesn’t sit perpendicular to the ground. Make sure that this isn’t throwing you off visually. Typically it shouldn’t be a problem because you need the cams to point to each other, but still, sometimes it can be a bit of an optical illusion that confuses.
2nd time I installed the belt the cam gears were apparently just barely “off” and the teeth didn’t line up with the belt (for both of them). I used a wrench on the exhaust cam gear to get everything “just right” with delicate taps. And then left the wrench on there (wedged against something else in engine compartment) to prevent movement while I fought with the timing belt. And the crankshaft gear marker was definitely lined up with the mark on the engine block before i put the belt on. Both times the crankshaft pulley ending up being slightly behind the mark on the lower timing belt cover (not sure why I said “ahead” in my previous comment). I think 3rd time will be the charm, and I’ll position the crankshaft gear slightly ahead of the marker on the engine block.