Nice man, good stuff! You should get it tuned professionally one of these days, sounds like a great setup (especially with the new header). I just went back and look at the shaved VC and oil cap…great idea and execution, that is slick.
Ill probably get it tune once I get some stage 2 cams. That’s the only other modification I will do to this engine, If I get to do it. I also want to go turbo on the spare b17a I have.
[QUOTE=aftermath1312;2304381]Funny thing is I don’t even have a shaved engine bay. Lol
I have in mind fabricating an oil cath can with a return drain back system that will also have a filler cap in order for me to be able to add oil.
[/QUOTE]
Sounds like a good plan! Do you have any pictures during the process of shaving it? Looks like you added quite a bit of material to the front and the back. It came out perfect!
Also what model of car is that arc intake originally designed for? I don’t believe there was ever one produced for the DA right?
[QUOTE=rollinmyda;2304412]Sounds like a good plan! Do you have any pictures during the process of shaving it? Looks like you added quite a bit of material to the front and the back. It came out perfect!
Also what model of car is that arc intake originally designed for? I don’t believe there was ever one produced for the DA right?[/QUOTE]
Don’t have pictures of the process. most of the pictures I have are from the different coats of primer I sprayed when I was wet sanding to get a smooth finish. Yes a lot of material was added. I have a friend who took it to work and had one of the welders weld the oil cap. For the front and rear part I used jbweld and sanded down until it was smooth. I’ve used jbweld on previous valve covers so I know the head wont cause any damage.
Correct. ARC didn’t produce an intake for our integras. This is for the EG 92-95 chassis. I made some aluminum brakets and the box bolts up using the stock location mounts for the intake box. The brackets I made work sort of like extension arms to connect the oem mounting point to the ARC box. I can take close up photos if you want to see them.
Oh wow, I was thinking that you welded metal pieces over the front and back to build them up to the shape they are now. You actually used jb weld to build that entire area up? I bet that took a while!
Sure if you want to post pics of the brackets you made I’d be interested in seeing them. I’m not planning to pick up an arc intake but I was curious which model you used. Seems like it fits really well.
lol yes I did. Didn’t take much, but the sanding to form the shape did take a while. the only part that got welded was the oil cap since I didn’t want to put a lot of jbweld. but the front and rear section is all jbweld.
yea no problem. ill take some when I get a chance to go to my parents house. The arc box fits good but I still have doubts if its really functional on the integra since the hood sits pretty close to the box. I think it might cause a restriction but since I haven’t dyno the engine I wouldn’t be able to know for sure.
I seem to remember reading somewhere that the arc intakes aren’t the best performing intakes anyway. I may be wrong and I don’t remember where I read it but they do look great!
I wouldn’t doubt it. One thing I don’t understand is, if this intake is so dahm expensive im assuming it should produce good numbers as it comes direct from the company, but I don’t see how this system helps. I see a few disadvantages using this box. First is, the aluminum gets hot and your pretty much getting hot air into the motor, also the box is catching all of the engines bay air, so it will definitely be hot. On top of that, the hood is really close to the only opening that the box has (maybe since its not made for the DA.) Now, I think if i was to wrap the box using heat insulation it will lower the temperature. Make some sort of shield to separate the engine’s bay temperature and find a way to get fresh air from outside (ducting pipes, remove bumper turn signals, ect) and It should be a better intake system. As it sits right now its pretty much just a “show” intake system. lol
A picture of the gauge mount I made out of a carbon fiber hood I had.

IMAG1279.jpg by aftermath1312, on Flickr
wow,great work.
thanks
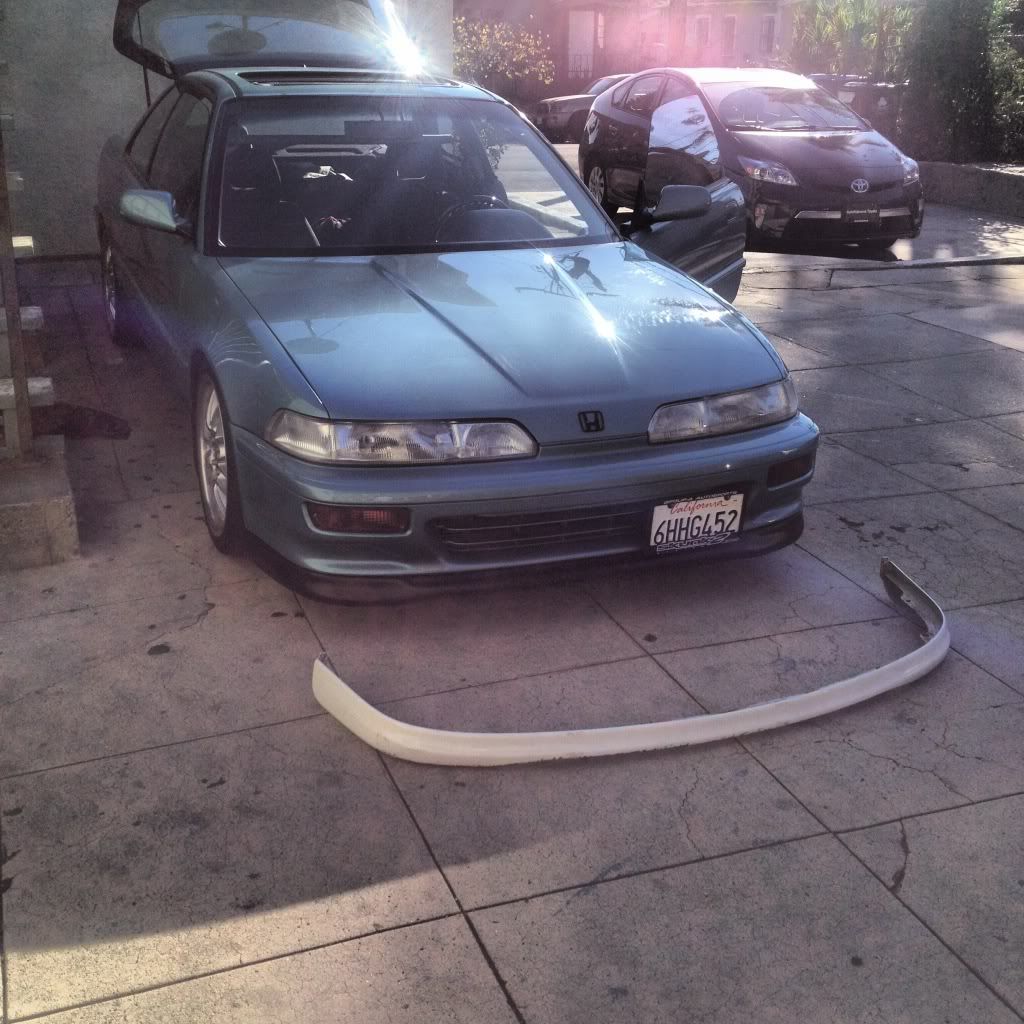
Got a new update for you guys. Ive never been happy with the lips offer for the 92-93 bumper. OEM is too thin and the type r style I have is a little too big. Plus u don’t like the middle section that sort of “bubbles” forward on the front part of the lip. The other lip Ive had in mind was the JDP carbon fiber lip, but I dont like how the carbon fiber looks with my the color on my car. Painting the JDP was my second choice. After measuring the JDM DC2 ITR lip, I was able to determine that it will work with the 92-93 bumper with some modifications.
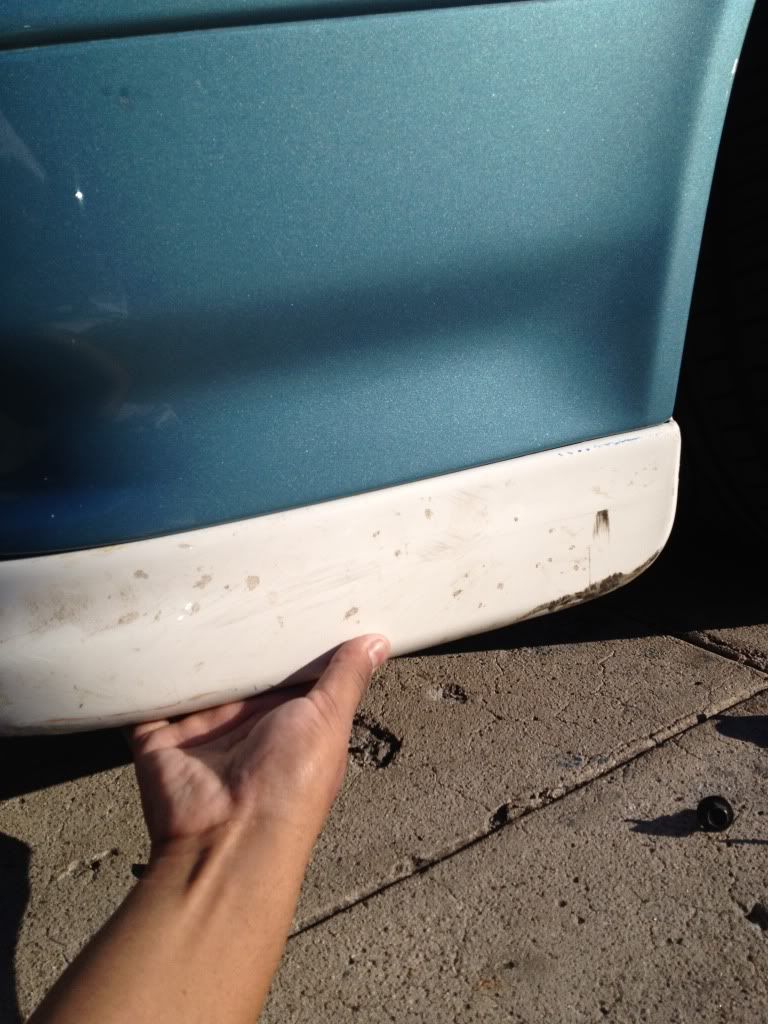
here is a comparison from the 92-93 type r style and the dc2 jdm itr lip

this is how im planning to make it fit after I have modified it. It will bolt on using the stock 92-93 bumper lip hardware locations.
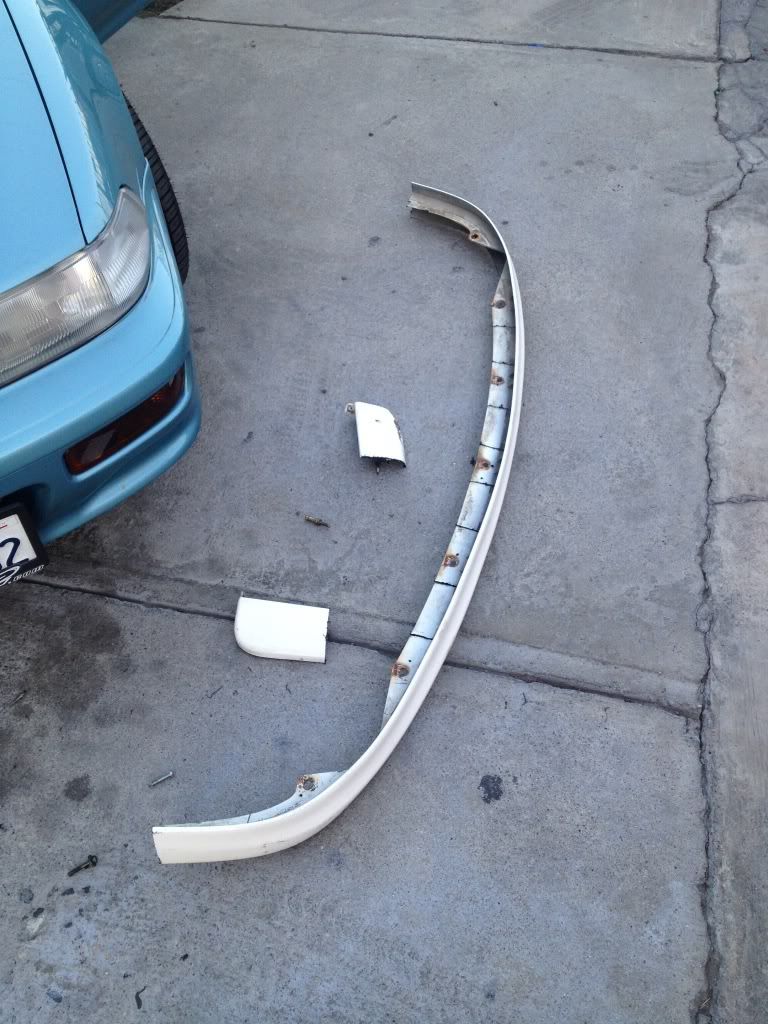
since the lip is too long I had to cut the ends of the lip
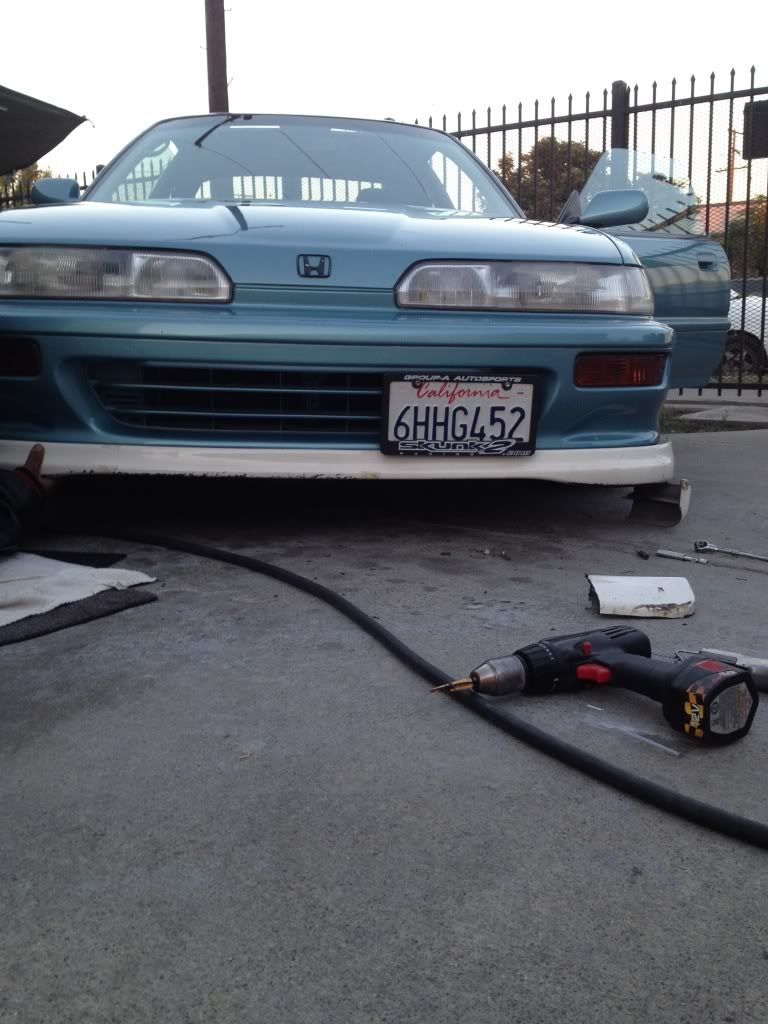
After some cutting and trimming I was able to bolt up the lip using the stock locations on the bumper
Here, im showing how the lip curves perfectly to the line of the bumper. I didn’t have bolts that were long enough and that the reason why I was holding it with me hand.
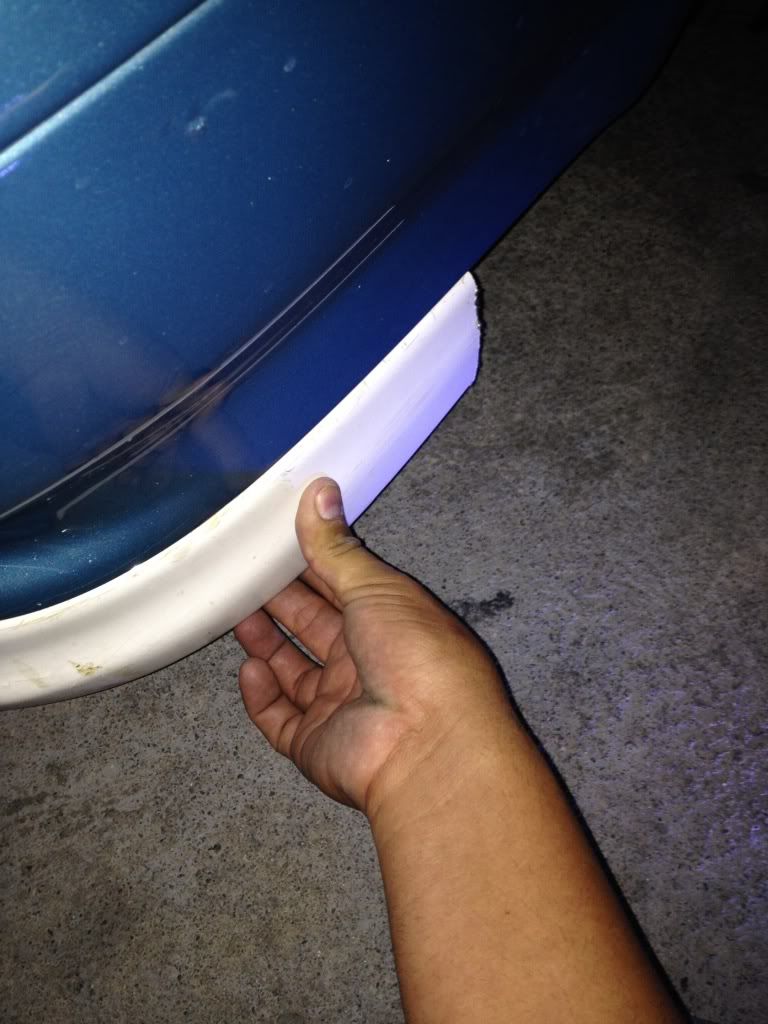
The next thing on the list is to shorten the end caps of the lip and attach them back on the lip. Will prep the lip and once its primer and painted, the shortening of the lip will not be noticeable at all.
That should end up looking pretty good. Very similar style to the JDP OE2. And actually there’s a company that makes an ABS plastic replica of the JDP OE1.
Awesome! I dig the custom stuff you’re doing. I like fabbing stuff up and making it work too, especially if it comes out clean!
The only one I saw was norcalstyles (I believe that’s the name of the shop) but it was polyurethane. Not a fan of the soft rubber style lips as any little bump will crack the paint. The abs plastic, fiber glass, and even the oem lips are a little more hard to crack the paint.
thanks. I like fabbing up little things here and there as long as they come out perfectly clean. If I know it wont look or fit well I will throw the idea to the trash. Most of my friends say im too picky/anal because I want things done perfect. lol
Yeah, that was the one I was talking about. Good to know about those different types of plastics, I was not aware.
Yeah, that was the one I was talking about. Good to know about those different types of plastics, I was not aware.
This is what’s wrong with most of the cars you see. There’s little to no attention to detail. Personally, for me it’s the details that make it or break it.
[QUOTE=Colin;2305600]Yeah, that was the one I was talking about. Good to know about those different types of plastics, I was not aware.
This is what’s wrong with most of the cars you see. There’s little to no attention to detail. Personally, for me it’s the details that make it or break it.[/QUOTE]
Yea. Most people prefer the polyurethane because it doesn’t break, but I personally don’t like them because they aren’t steady and if the get hit the paint will crack. ABS or fiberglass will break if hit but im not planning on playing bumper cars with my lip.lol
I totally agree with you. Im more of the small details than having a bunch of high end parts that aren’t installed correctly. example: Having the rare optional items and the car body lines not properly align. Even having the rare front lips with bumpers that are align to the car. lol
^Amen brother!
I took a ride a few weeks ago with my coworker on his 2011 wxr sti and I notice that his cluster had an integrated shift light. I like the idea and decided to do one for the integra. I didn’t know were to mount the light. at first I wanted to used some of the existing warning lights that the cluster already had, but after hours and hours of looking I wasn’t happy going with that route. I bought a 5mm 12volt blue LED and decided to mounted on the RPM gauge.
Note: I can fully adjust the setting at which RPM I want the LED to turn on. Also I can adjust how bright the LED light will be. At these pictures I had set it at a low RPM.
you can see the LED under the “min” letters
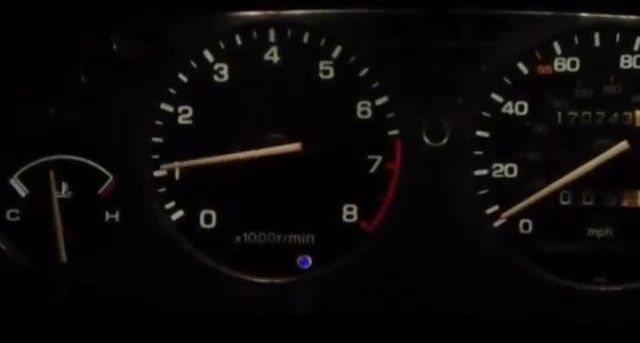
had the shift light set at 2k rpm

Bump for the homie.