Small update. Yesterday, I was staying at my girlfriend’s place and it was a pretty nice day the day before so I brought shorts and a hoody. I knew I was going to the junkyard, but I didn’t look at the forecast, silly me. It was ~50F and pouring, but they had a full DB1 for me to rip parts off of. It cost $2 to get in. I didn’t have cash. I had to leave to get cash. I went in, realized that a pair of vice grips, pliers, and wire cutters wouldn’t cut it. I had to leave, find an autozone, grab a $5 tool set and head back.
So… after all of this I was wet and cold but I got most of the things I needed. Here’s what I got and learned…
Fuel Pulsation Dampener: On the B18A1 in the 1991 integra I was looking at, it sits like this on the fuel rail L__ I had to pull one off of a civic since it looks like this O---- and that's what I'm working with. Initially I though that there was a banjo bolt that would be in use, but the fuel actually flows through a 'muffler gasket' (A gasket with a couple of holes in it) through, into the Pulsation Dampener, then into the fuel rail. Good information.
Gaskets for said Dampener
OEM Fuel Pressure Regulator + Lower fuel return line: Looking at my pictures, mine was cut, so I figured, why not.
IAT plug, clipped as close to the wiring harness as I could. I don't know how vital this is, but probably good to have.
Those three sensors/valves that sit near the winshield cowl on the driver side, including the MAP. I'm not sure why I grabbed them, but I figured I might have a vacuum nightmare in my near future.
So, I was soaking wet, cold, and generally no longer motivated yesterday. Headed to the garage with a 6 pack of keystone… because I’m classy. I bolted on the FPR, I plugged in a few more plugs. Installed the mushroom tip and it’s gaskets. Drank two beers and called it a day. The goal at this point is to fire the engine, make sure it runs, and is in usable condition. Kinda backwards from what everyone else does, but I need to get it on the track asap, so that I know what I’m going to need. I’ll probably do a separate engine build that complies with NASA Performance Touring rules that can be dropped in and dyno classed and get it into PTE, but I just want to get this on the track so I know what other flaws it has. I drank 2 beers. Called it quits, in case you were wondering.
Thanks to Colin for helping me again. You’ve been invaluable.
One other thing, if you or any of your friends need to deal with the wiring mess and random plugs, and want to mark things before/during a swap, this page is stupid helpful: Honda OBD1 Plugs and Wires Diagram
Another small update. The next things I’ll be ordering will be new wheel bearings (installing extended wheel studs), Gates timing belt kit, and likely wheels/tires. I met the guy who will be doing my cage. Very friendly, and incredible work. He’s a structural engineer and has a great reputation for both safety and stiffness.
Anyways, I know y’all love pictures. My project for the evening will be installing the extended intake manifold studs from streetrays, Blox intake manifold gasket, and Blackworks oil filter sandwich plate. I’ve got a mechanical Autometer oil pressure gauge I will be adding here. Haven’t thought about where to tap for water temperature yet, and I may buy a matching Oil temp gauge, but I’m not too concerned with that at the moment.
Chose streetrays because they’re in Austin, so stuff gets here quick. I haven’t heard of them but there stuff seems to be about the same quality as anything else I’ve seen. Blox gasket doesn’t have the cleanest cuts, but it was in stock at JHPUsa and an ebay seller sold me one that wasn’t in stock, so I rushed it. Patience is not my strong point. The Blackworks sandwich plate seems good. Came with numerous imperfections on it, but I could care less since they’re not around any of the sealing surfaces. I think they should include some sort of teflon tape or something with it, but whatever. I got a light color so I know if it leaks or not.
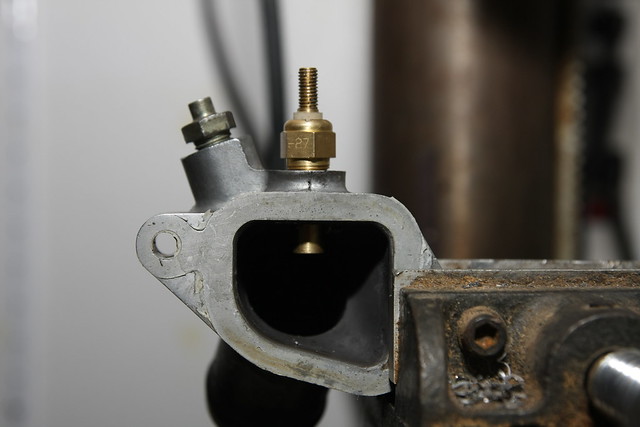
When it comes to stuff like gauges I try to make things as simple, clean and factory as possible. I also like killing two birds with one stone. That mentality is what brought me to how I did this on my previous engine. We previously spoke about all of those extraneous coolant lines - well here’s how I took care of part of that issue and also found a place to mount the sensor for my water temp gauge.
Note the upper water neck and how it has a bleed screw and a nipple for a coolant line which runs to something like the FITV or something else I didn’t need.
I removed the coolant nipple then drilled and tapped the hole for the thread pitch of the sensor
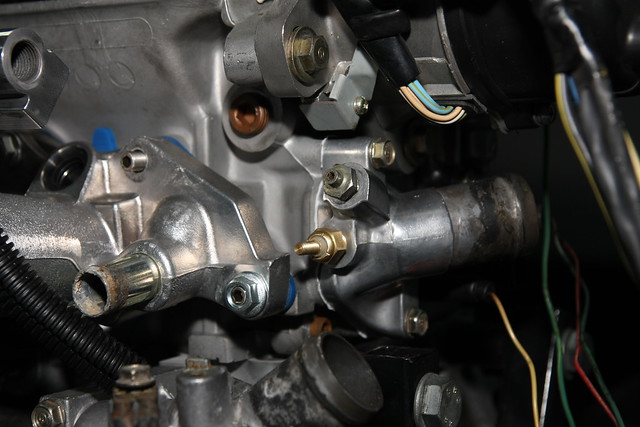
Installed on the engine
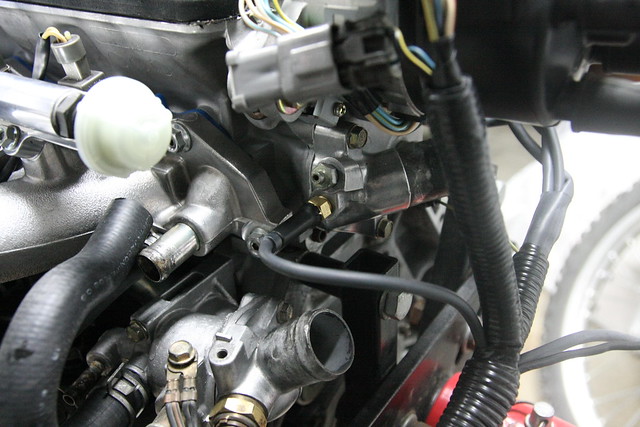
and with the wiring integrated into the engine harness
Yeehaw updates… between yesterday and today I’ve placed quite a few orders. I’m still deciding on a steering wheel and short shifter. I bought ES shifter bushings because the shifter just feels sloppy on this car compared to my mustang. May be the 20+ year difference between the two. Also looking into wheels. I’ve decided on 15x8 per the input of you know who you are. Any specific offsets or…? I’ll probably do the same thing that you did Colin on the water neck. Looks stock and I’ll be able to run the lines with the oil lines. Anyways, things I ordered yesterday-today:
Moroso 4qt oil pan - baffles!
exhaust stud kit from streetrays
JAZ sealed battery box - Just because my battery is currently in the trunk..
Spoon style mirrors - Missing the mirror on the passenger side, almost the same price
Water pump, tensioner, timing belt - Never trust the last person's work
2 front wheel bearings
Auto Meter nylon tubing kit for the hand me down mechanical gauges from my racebuddy
Water Bypass hose, from water neck to IM, or whatever. Mine looks like it's from a 1994 motor :)
Thermostat and gasket - while I'm there...
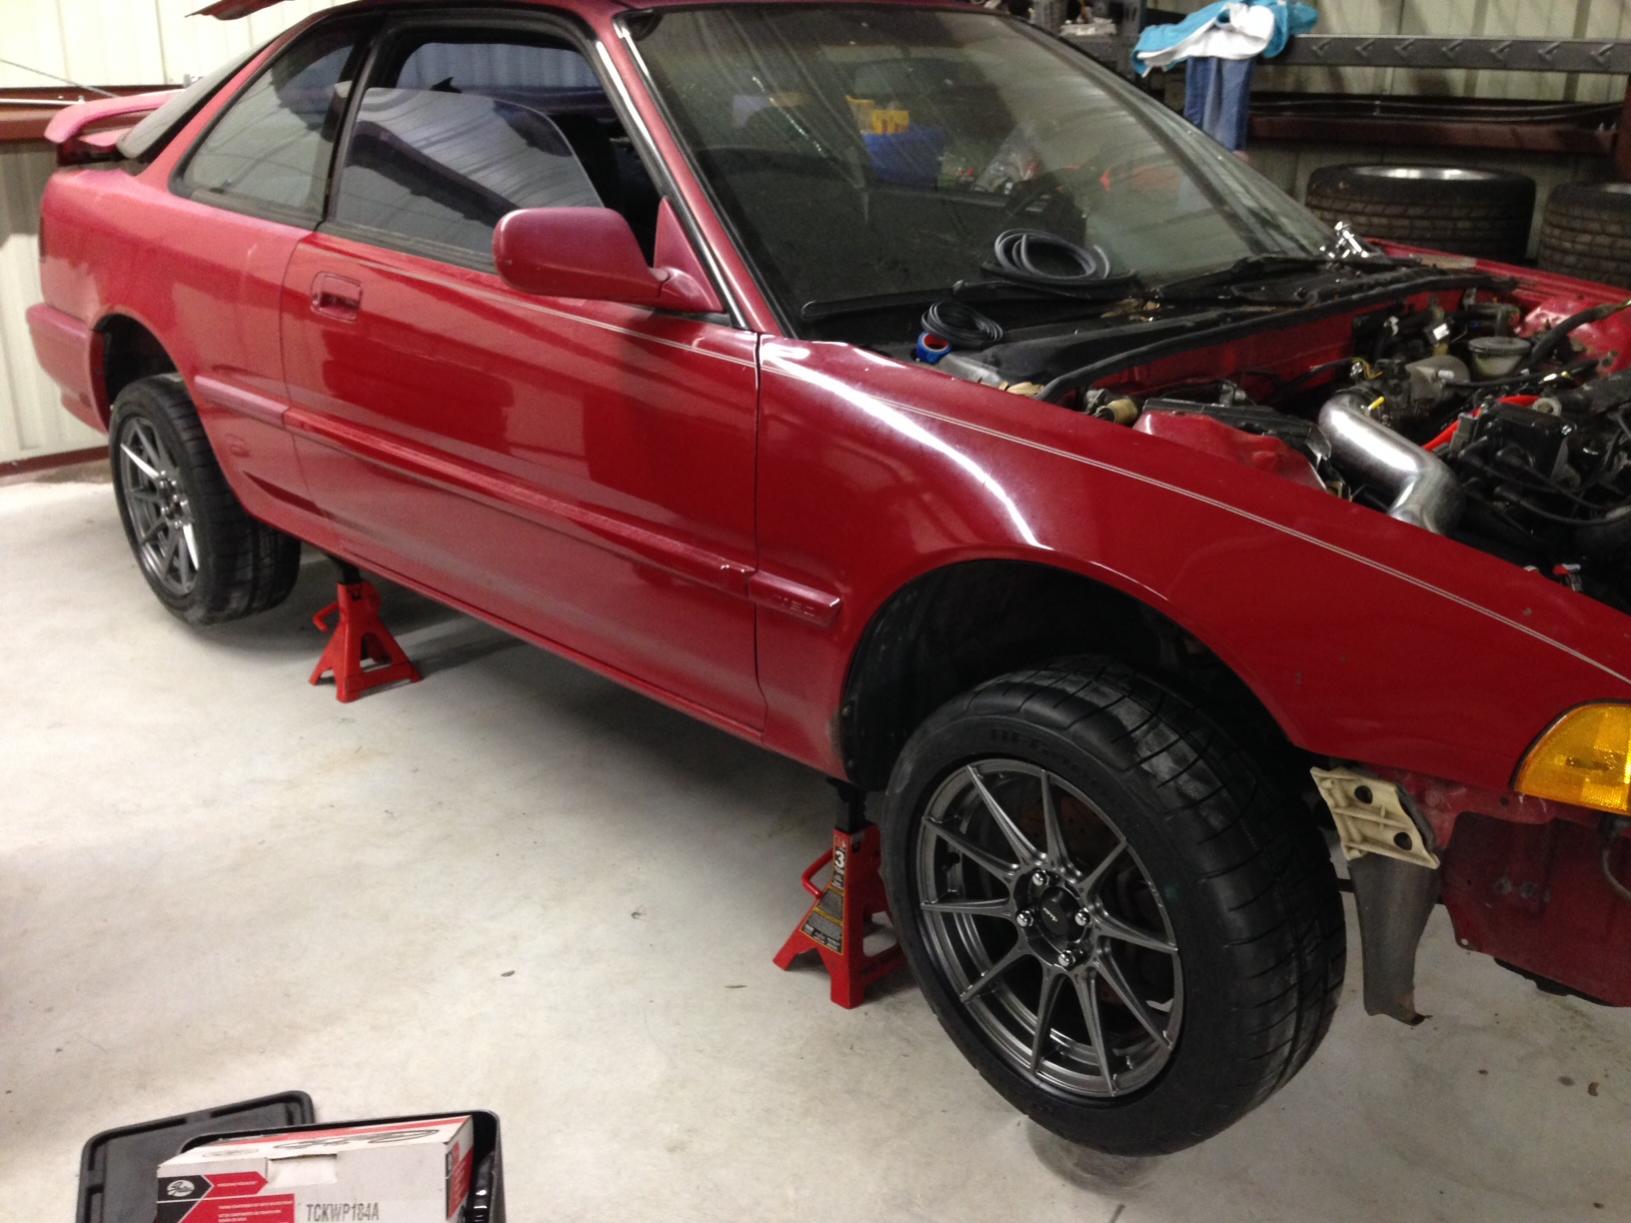
Starting to browse colors for the car. I’m a big proponent of orange, but only in healthy doses. I’m thinking battleship gray. (I’ll actually be using an older non-metallic porsche color) Current car, of course these are just track wheels… OriginalCar by Rob Heckel, on Flickr
I’ll miss this car once I trade it on a truck, probably in a month or so. I’m a firm believer that when you turn your car on, it should return the favor. That mustang surely does… Consumable expenses and dwindling reliability has just put a bad taste in my mouth. Check engine lights, loss of power, nearly $500 dollars in brake pads (mmmmm carbotechs…) and ~1,200 per set of tires.
Anyways… once the stuff is installed/I do more on Wednesday, I’ll send some updates.
More old pictures that just resurfaced… Hallett in Oklahoma at Oktoberfast, the Porsche Club Race. 2013 Mustang GT Hallett by Rob Heckel, on Flickr
Small update. TireRack is amazing. I placed an order yesterday around 4:00 pm. My wheels are out for delivery now.
I wanted to go 15x8, but I looked into SCCA and NASA Honda Challenge rules, and both are limited to a 7 inch wide wheel. I went with the Advanti Racing Storm S1. Not much to look at, but hey, they’re 10lbs. I’m going to run BFG Rivals until the car and I are ready for R Comps. Shouldn’t take too long… ran R comps on the Mustang numerous times, not alot of room for error there. The tires are 205/50.
I’ll be in the garage tonight, so I may toss em on and take pictures. Time to start looking for a local powder coater Just thought the service from TireRack was utterly amazing, especially being that the car came with 14 of the 16 lug nuts
Those are 205-50? They look almost identical to my 225-45’s, I was expecting more stretch for a 205 on an 8" wheel. Although I’m not too fond of the style they are definitely one of the better choices out there for a 15x8, most other options are either much more expensive (e.g. Volk TE37SL) or much heavier (e.g. Rays 57DR).
What offset are they? (sorry I missed your previous post where you were asking for suggestions on this)
Oh, I totally read that wrong… A friend of mine used to do track days but is now prepping to get into HC and he’s bummed about going from 8" down to 7" and from a b18c down to a b16a (probably best to just start with that stuff to begin with).
Small update. The b18b1 ran but it sounded terrible. The timing belt had far too much slop for my liking, and was never finished correctly. The b18b will go on a stand and eventually get built for durability; however, I’m on a limited timeline as my home track is closing and I don’t want to keep borrowing cars to track there.
B20 will be delivered late Feb, early March. From what I understand, it’s a 96-98 P8R Spec I’m buying directly from hmo. I checked jdmenginescorp.com and the owner rubbed me the wrong way… I asked a few questions about shipping and the warranty and he brushed me off and told me he didn’t have time to help me over email. Steve at HMO pointed me in the right direction. It was a bit more than I wanted to pay, but their reputation precedes them.
In addition, 7.x lb Fidanza is on order. I have a b16 trans, supposedly. I’d like to grab a clutch for it, but I can’t confirm the transmissions. No sticker, or any other imprints unless I’m missing them. I’ll see how the one in it looks and hopefully identify whether or not it actually has a quaife and maybe what the trans is.
Other recent updates, the interior has started to come out and the battery is mounted in the rear passenger corner. Sturdy, and I’m happy with it. I have goodridge lines all around… except the passenger side front. DOH!
Oh, and the Mustang is now officially gone. I apologize to the next owner. And I’m coming around to truck life I guess…
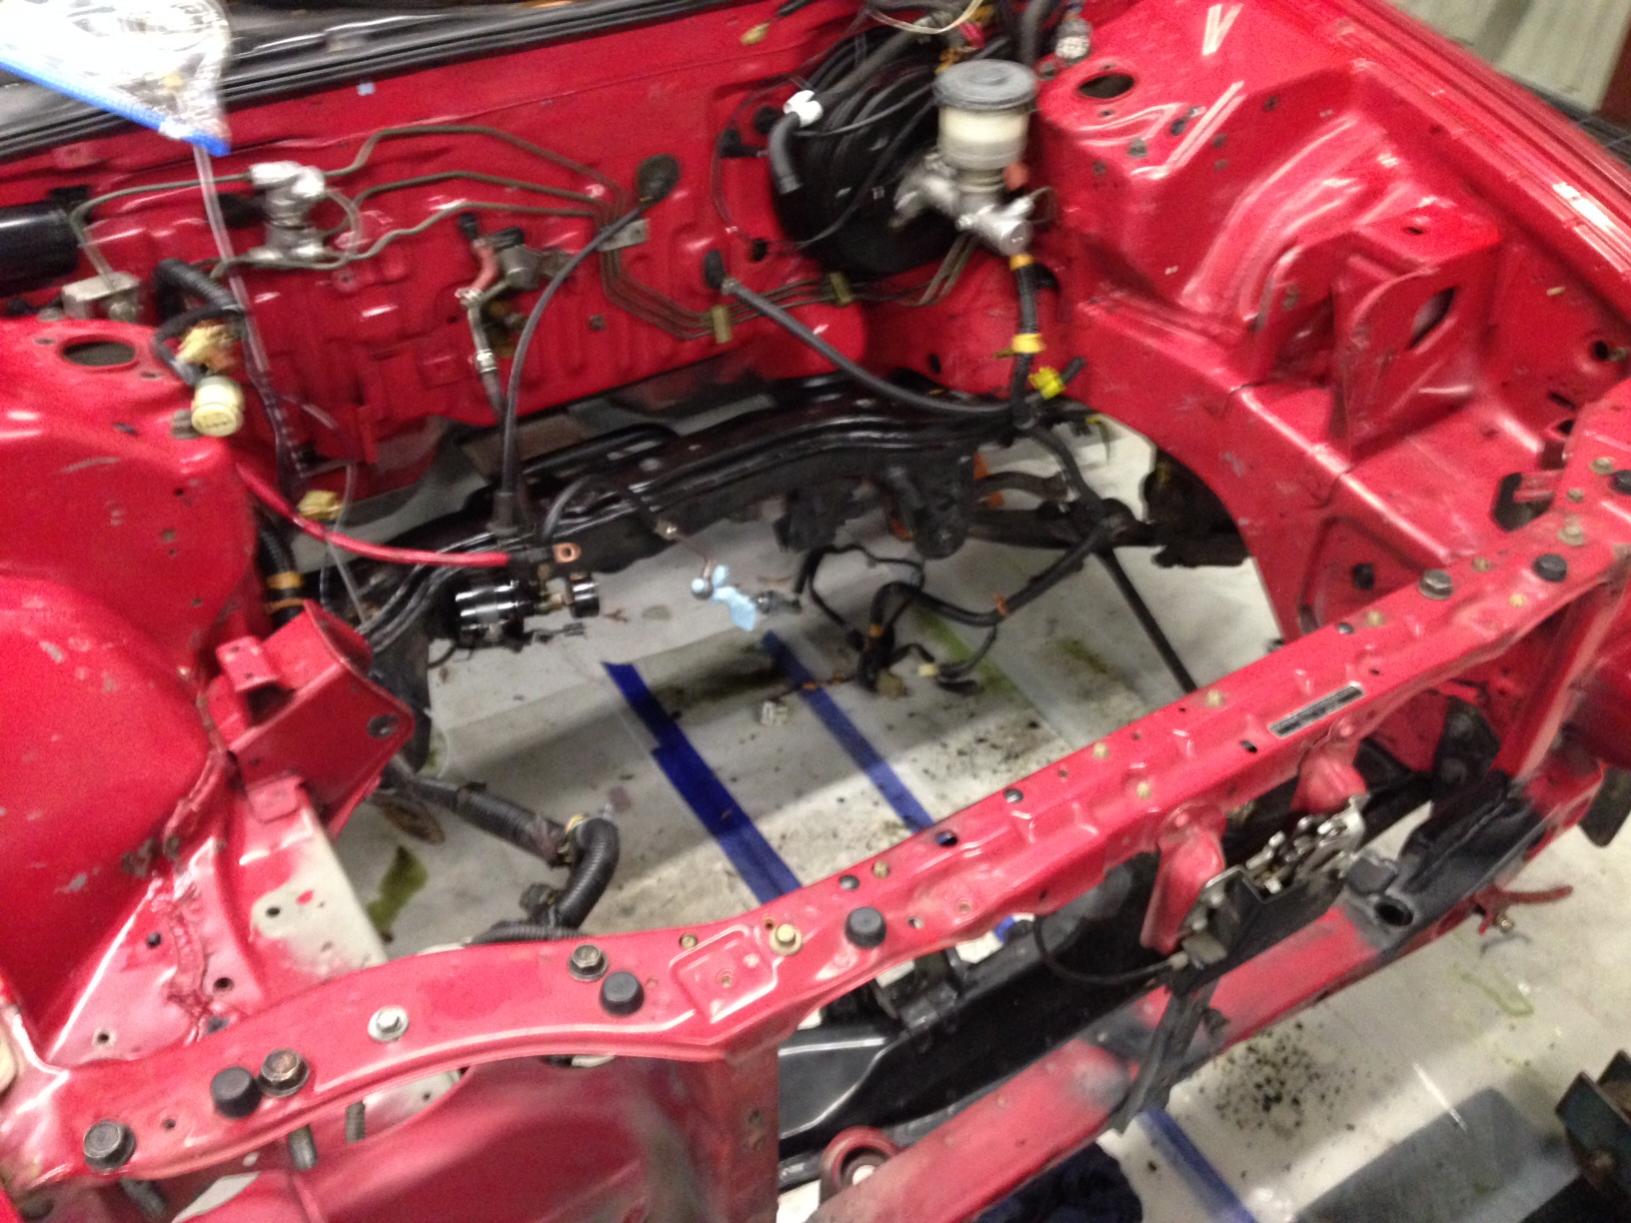
Completely degreased the bay. Use some steel wool to rough the paint up in the bay. Going to spray the whole bit down and then start with some painting of the bay.
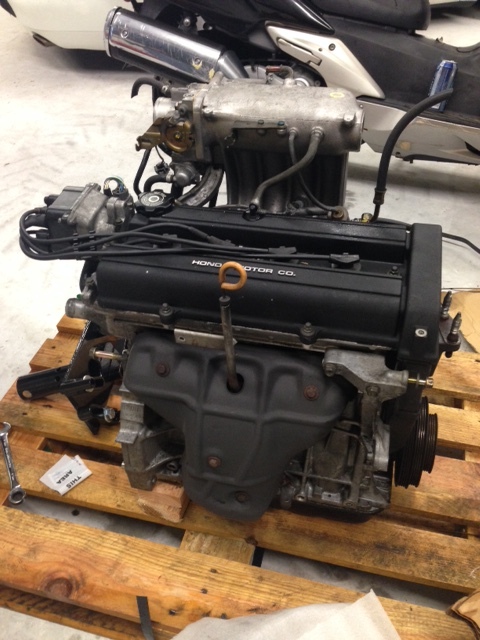
Also, the B20 arrived today. Overall I’m very pleased with the look and cleanliness of the engine.
Things that I’ve ordered from AcuraOemParts.com:
VSS/Speed Sensor clip. (I intentionally tucked this into the put while doing the swap and still lost it…)
Clutch Case Cover (Apparently plenty of cars drive without this, but I spend a fair amount of time off track lol)
Bolts for said cover… easier to just have the right parts for 77cents.
20mm Sealing Washer -> Plugs the outlet from the head to the heater core. Still trying to figure out what to do for the thermostat housing.
Oil dip stick tube. The one on the B20 would impede my vision sticking through the hood. Just bought a b17 one for 9 bucks and will use my LS dip stick.
Moroso 4qt Oil Pan has arrived. Fidanza aluminum flywheel has arrived.
I’m getting ready for some fun. Hopefully my next updates will be dropping the engine in!
More things/notes…
Put a freeze plug in the head where it pushes to the heater core. I’m going to see what I can do with the rear one. Maybe steal your idea Colin with the temp sender.
B20 w/ P8R head
Engine bay got a layer of spray paint to lighten it up, and halfway match the paint.
92+ B series transmissions = same clutch spines.
93 and older, cable, different throw out bearing than hydros (Action Clutch sent me the wrong one…)
Timing Belt is done on the B20. Gates. Water pump was done at the same time and the tensioner. (Obviously)
Motor mounts are filled with construction adhesive. Looked like a dog literally shat in them. Sanded, undercoated them. Better.
6 puck sprung Action Clutch + Pressure plate as bolted up. I was going to use unsprung, but it seems like it would be overkill for the power, decrease the life of the tranny, and be incredibly difficult to drive with 7lb flywheel.
At this point, stupid-long rebuild has taken the wind out of my sails numerous times. Looks like I’m going to finish up some other small stuff. Another member is supposed to be making a trip down to get the B17 for his GSR, so I’m really excited to see it going to A) a g2ic member and B) into a gsr. I’ll also be getting rid of the B18B and as much of the interior as he wants.
Then it will go for it’s cage + sunroof removal + misc…
Don’t fret dude, this isn’t a long build at all, I feel like I’ve been building mine for 15yrs! And good choice on not going unsprung. People have a tendency to overestimate what they need for a clutch, it’s road racing / track days - not drag and you don’t have a bizzillion horsepower car. Even a stock clutch would be pretty sufficient, I’ve been running an Exedy organic racing clutch for a long while now and it’s great, never once did I think I needed a stronger clutch. If you were turbo and pushing 400hp then it may be a different story, but for us NA guys <250hp doing track days you really don’t need anything crazy.
Haha it feels long for me because I’m trying to have it done before my home track closes in June… Forever.
Anyways! A member here came down from the Carolinas and took the B17, B18, and nearly all of my interior. We worked out a good deal that should help him finish up his car. I’m very happy that the b17 is going to go to a good home along with the rest of it.
Tomorrow we’re going to drop the B20 in. Got my replacement throwout bearing from Action today. Got over excited and bought an imperfect carbon fiber hood. For being brand new, 375 shipped seemed like a good deal. It will probably get painted anyway… more updates soon!
B20 is in. Bouncing idle. Checked all of the vacuum tubes and sprayed everything with carb cleaner to see if the idle would spike, but nothing. Radiator fan wasn’t kicking on and I think I killed the temperature sending unit. Ordered new fan switch, temp sensor, and sending unit. Going to go ahead and wire the fan to the switch directly like the non-ac diagram. (As seen here for reference…)
Carbon Fiber hood came in yesterday. Couldn’t find any imperfections, but maybe that’s because it’s not for show.
Here’s hoping that all the new sensors and wiring will get my idle stable. If not, it will just have to go to the cage builder with a bouncing idle.
ECT sending unit, fan switch, and ECT sensor were all replaced.
Gauge in the GSR cluster is screwed I think. Fan won’t turn on until the temp gauge is nearing hot, but the ohms are reading correctly. Guess I will be going aftermarket for this too…
Did you end up doing the wiring modification for the fan system to be like the non-ac models? Have you confirmed that the thermostat is opening when it should?
Yeah, I went from the fan switch, directly to the thermostat ground since it was closest. For now, the positive is still running through the original relay and I confirmed it’s always hot. (Remember, some amazing electrician worked on this before me…) Now that the car is running well enough to move under it’s own power, after the sunroof is removed/welded and the cage is in, I’ll start some of the projects like cleaning up the wiring, removing unnecessary parts, cleaning up the brake lines, and what not.
At this point, I haven’t tested the thermostat, and I probably should and I probably should have replaced it when I received the engine. Shame on me. I’ll probably scoop up a generic 180 degree one and stuff it in there temporarily until I can make it to the stealership.