I’d recommend against a short shifter made of aluminum. I had the cheap ebay double bend shifter and it literally broke off at the base hitting 5th gear on the track. Ruined my entire weekend.
I’m now running a fastline performance (FLP) tall shifter, and love it.
I will definitely look into that. Thank you for the recommendation. Right now, I believe the car has the stock shift lever, though I stuck ES bushings in the linkage. Still very sloppy. $199 for a shift lever is a hard pill to swallow, but it looks like some actual thought went into that guy.
Hoping to do a few laps around the block tomorrow in it just to make sure nothing is bound up. Hopefully I can reach the pedals from a lawn chair or a wheel.
Got to take it for an unofficial first drive on Wednesday. Felt pretty good until it just died on me. My friend hopped out, fuel pressure was reading ~40, the spark plugs were sparking. When we held one of the wires to the VC, it seemed like the car wanted to start. Eventually it did and we drove back. Not sure what the issue could be, will keep doing little test drives, but this will enough to get it to the shop for it’s cage.
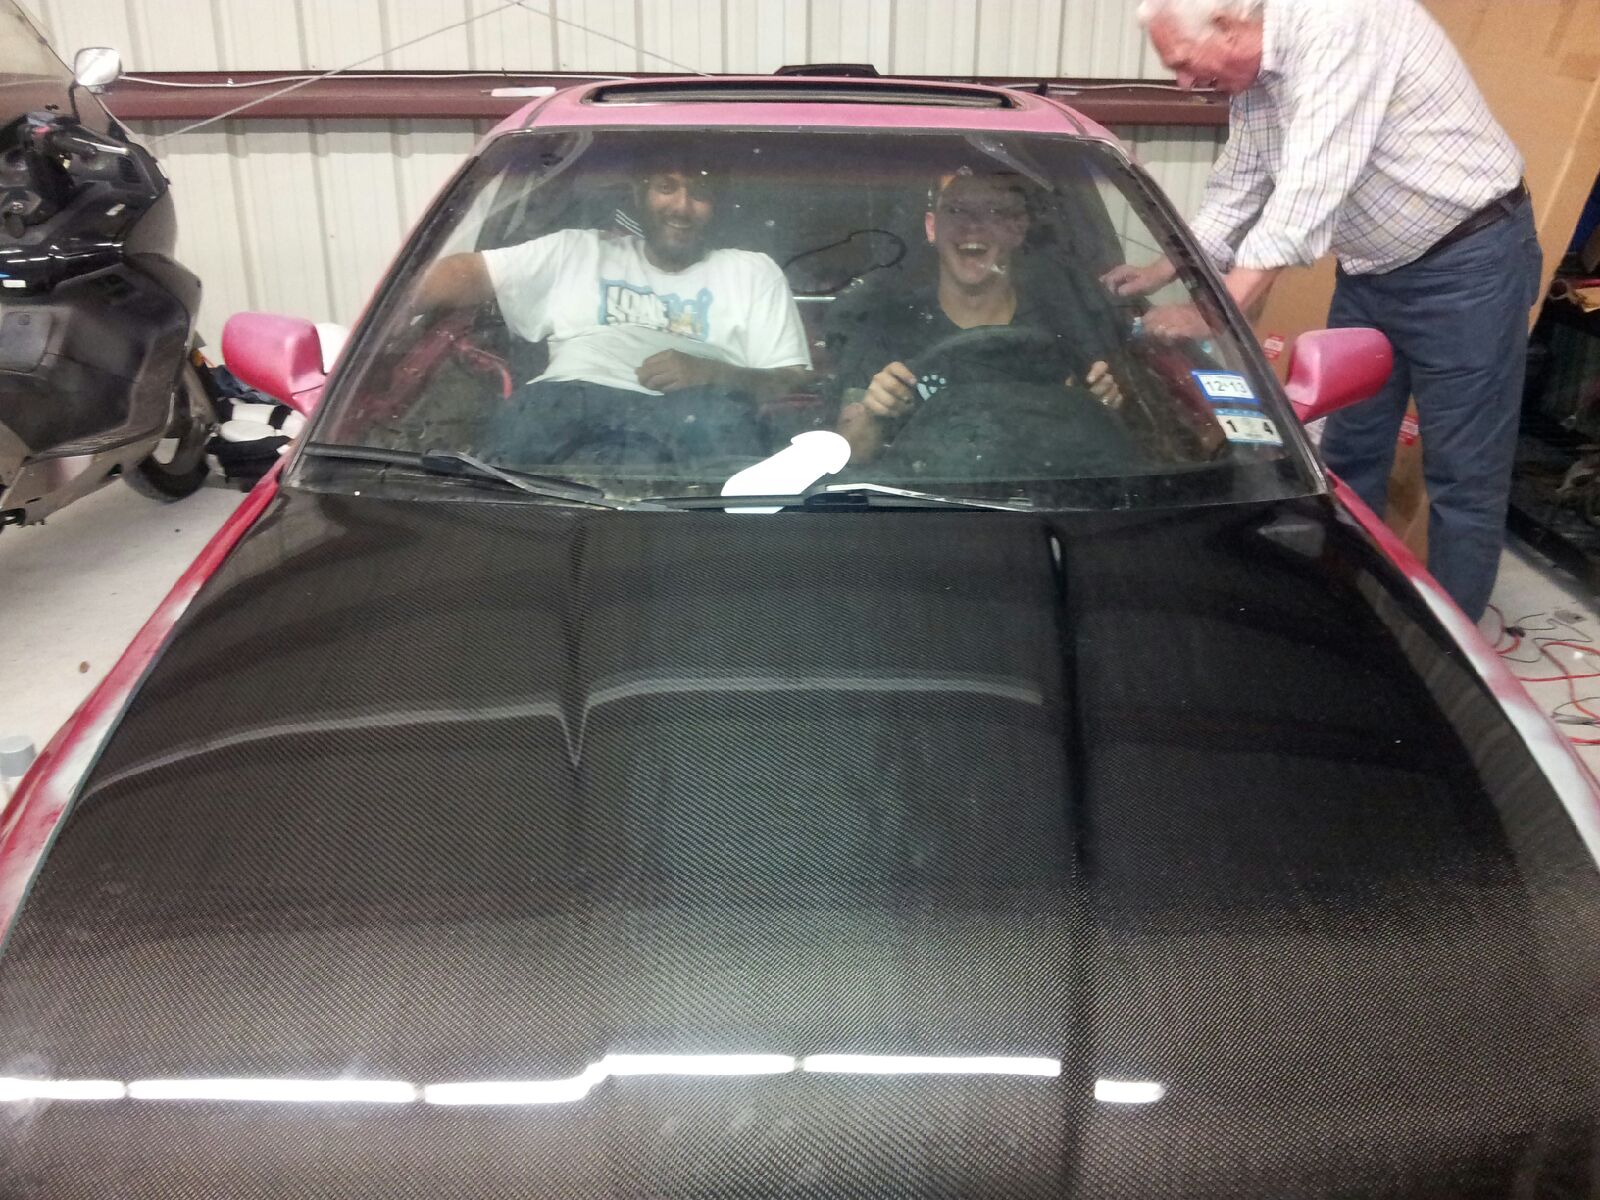
Here are some pictures, ignore the weiner. I’m also fully aware that it’s ugly. Rome wasn’t built in a day…
Thanks. Actually got it for 375 shipped. It has a couple of imperfections in the clear, but I don’t notice it. It’s a seibon. Good quality otherwise.
Ground Controls installed. New thermostat in. Bypassed the clutch interlock switch at the starter relay. Tapped into the black/blue wire and grounded it right to all that metal in the audio cage. Works for now.
Dropped her off for the cage yesterday. Figured I’d include a pic of my daily towing the old girl. I’m also picking up another Sparco with a full halo. Yet another hand me down. In addition to that hand me down, I got a PLX smf-ar w/ gauge. Just need to get a replacement wide band sensor for it.
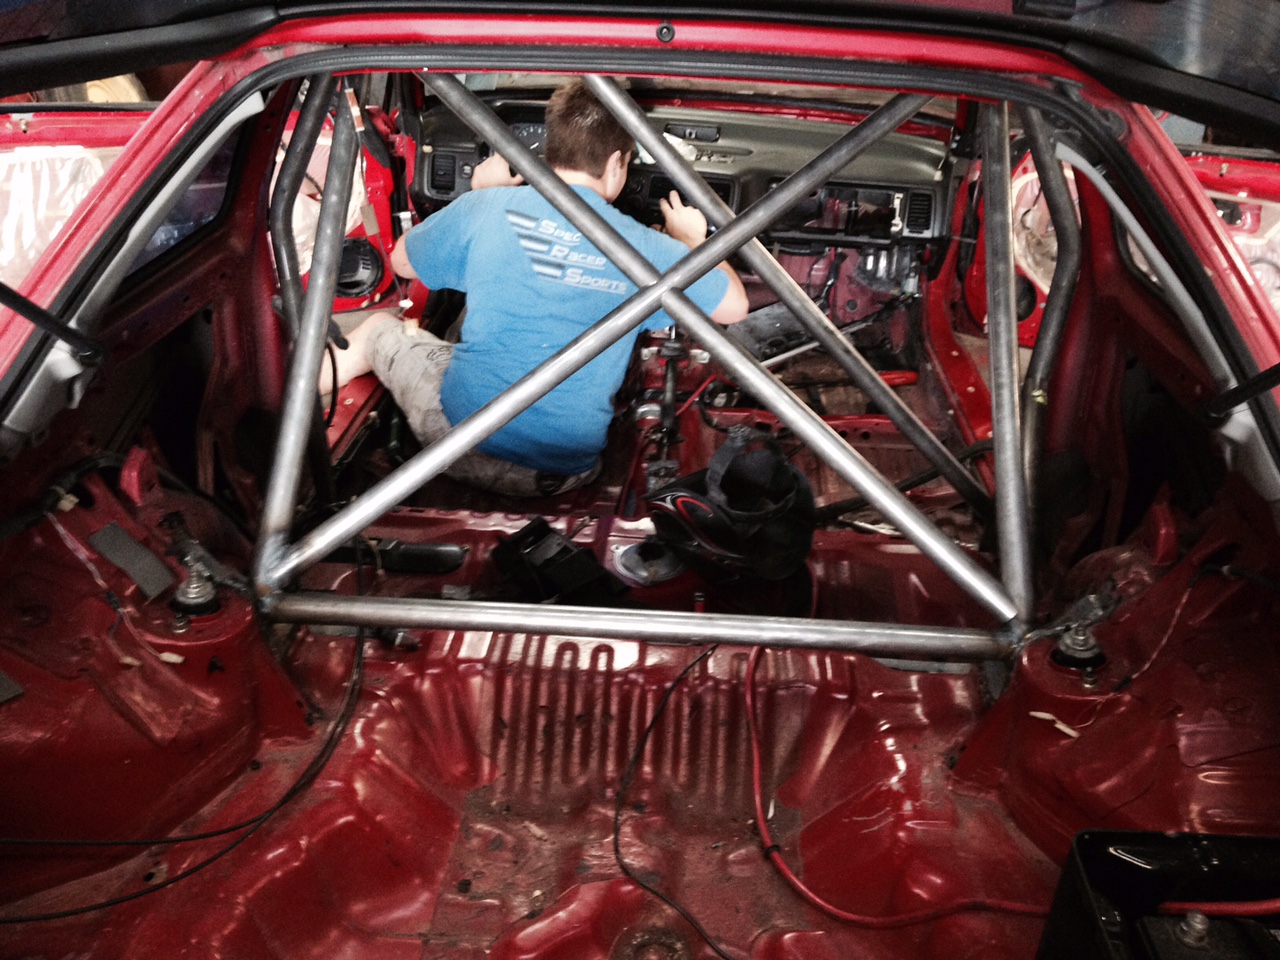
Next time you guys see pictures, she will have the cage in and the seats mounted. And I will probably be out of money
Yawn… Will go check on the cage today or Monday. Got bored… Latest order. Was missing the passenger side stainless line for some reason. Will probably just replace this one while switching over to Motul RBF600. I ran that in my mustang with Brembos and it worked wonderful. Here’s hoping it will do the same in the integra. Also looking at ducting ideas for the brakes. May consider doing something different than the silicone hose and holes in the bumper. We’ll see how it works out with the dust shields removed first.
Monte Carlo is a great wheel, I chose the Mod78 myself which has the same frame shape/size but comes in suede which is wonderful with driving gloves. Regardless, I love that shape, it’s hard to go wrong with it (same as Spoon too). Also I opted to get two quick release setups so that I have the Mod78 as my track wheel and then a Mugen SW4 as my garage/beater wheel since I don’t want to wear out the suede on the track wheel. Probably not worth it for you though since I assume you’ll be trailering the car to the track whereas I drive mine.
As for ducts, I’d definitely hold off on that and put your time/money into other more pertinent things. The stock brakes should be good for quite some time unless you’re really fast. I made it pretty long with my stock brakes and HP+ pads until they started overheating. New calipers were a good idea in my case so I went ahead and upgraded to ITR calipers instead of replacing the stockers, also went to race pads. Haven’t had an issue with that setup and I have zero ducting. I definitely recommend race pads since it seems you have some track experience. And race pads will tolerate heat MUCH better than a street/track pad allowing you to wait longer until you need ducts. My buddy still runs stock Integra sized brakes and Hawk Blues in his EF with no ducting - and he’s FAST. Of course the car being lighter does help as well.
I was originally going to go with a suede Mod 08 but I decided against it since I’m not a particularly patient or meticulous person when it comes to my cars. I would be the first to hop in with filthy hands and move it to another spot in the garage, then complain about the suede being ruined. I also noticed it was the same as the Spoon units. It’s a good budget budget steering wheel. Almost looked at NRG’s, but I only hear horror stories. Nice collection of wheels you have their Colin… Beater SW4
Right now I have no idea about what pads are on the car and the brake rotors are cross drilled and slotted. I haven’t driven the car enough to even get the rust off the rears. I’m going to run whatever is on it first at an Auto-x or around the neighborhood just to see what they are, then I’ll switch over to Carbotech. i’ve used the XP-10 front and XP-8 rear on both my Mustang and My friends miata that I frequent, and I must say they are the nicest I have driven. Excellent results when hot, great modulation. Price is steep, but they are worth it. I will run those with either Brembo or Centric blanks. You’re right about holding off on the ducting. I’ll do what I can with what I have until I need more.
Just looking for little projects even though there’s already a ton of them. When I get around to doing the steering wheel (I’m an idiot, the steering wheel should have gone in before the cage and seat…) I’ll be drilling out the locking mechanism in the steering shaft. I’m also going to POR-15 the interior with their top coat. Then we’ll see how offensive my color combination is.
Some minor updates… And some major PITA for those of you who love misery…
Once of my power mirrors was missing the mirror glass, so I opted for some of those cheesy Spoon style mirrors from ebay.
Pros: They’re about 8-10 lbs lighter than the stock mirrors.
I now have 2 mirrors. Maneuvering around the shop should be a little easier.
Cons: They shake a bit. (I’ll fix this with some silicone or something)
They feel like a serious stone flying off the track will shatter them into pieces. ($20 more…)
Next up, I wanted to get the wing off. One stud was spinning in the spoiler. Another nut had been mangled when the previous owner tried to remove it. Out came the hacksaw to take it off. Success.
This left me with a ton of wires that I had no need for. So I started delooming and tracing the wires. Needless to say, this is the beginning and it’s going to be a long road. Anyone have a favorite wire wrap that you use? I was going to head to Fry’s or something to poke around.
I’m really starting to slow down, but at the same time ramp up. My patience has greatly increased with the car lately, and I think it’s because I knew the wiring and interior paint was coming.
Until next time!
When I did my engine harness I purchased all of the loom and heat shrink from McMaster-Carr. They have a great online catalog and they ship SUPER quick.
I opted for the “spoom” mirrors as well. They’re super cheap quality but IMO well worth the weight savings. They do vibrate a lot but so far I haven’t had a problem on track or public roads and they’ve held up to debris and rubber from tires on track.
As for the wiring, personally I prefer the OEM look so I’ve primarily used split loom whenever I rewire something. I ordered a TON of heat shrink when I redid all of the wiring on my car from the firewall forward but other than the battery cables I only used the heat shrink on soldered/crimped connections or in some areas where wires came out of the split loom but before the connector. I depinned everything in order to do this. I would not suggest heat shrink unless you’re planning on depinning the connectors which is a lot more work and leaves yourself open for making mistakes which could cause big electrical headaches. If you were building a show car then maybe you’d want to go with the trendy “Raychem” or something of that sort but for your purpose I’d use split loom and 3M 88 or 33 electrical tape (I would not recommend cheaping out when it comes to electrical tape, the expensive stuff is worth the extra money). IIRC I also got my heatshrink from McMaster-Carr.
Some other resources I’d recommend:
CJ’s Wiring (Carlos Zapien) http://cjswiring.bigcartel.com/: You can find him on facebook, he’s also on H-T but I forget his username. Really nice guy running a small business making harnesses. I ordered a bunch of OEM pins, seals and some connectors as well, his prices were very fair and about half what Rywire was charging.
www.cycleterminal.com I was also able to get some headlight connectors here I was not able to find elsewhere (although since then I’ve found them on ebay as well). I forget the name of the guy that runs it but he’s super nice and although it’s motorcycle-centric he actually likes older Honda cars too
Now that I’ve done my wiring from the firewall forward I’d love to do all the under dash wiring and everything rearward of that but it’d be a pretty big project. Maybe someday I’ll get around to painting the interior of the car and re-do all that wiring at the same time.
Was curious as to whether or not my OEM temperature gauge was cooked from when we were originally troubleshooting. I picked up a Prosport Gauge. Pretty good quality for what it is… came with a hood and mounting cup, as well as wiring harnesses. I tossed an adaptor into the hose just to temporarily place it. (It will probably stay like this for a bit until I start shakedown runs) The gauge read between 190-200 when the fan kicked on, so I believe it’s pretty close.
More interior painting this weekend. Will get some pics once it’s done.
That seems about right. The OEM gauge is crap, I feel like it reads “normal” whenever it’s within 50deg of normal. And by “normal” I mean the 194 deg at which the thermostat is fully open. I have a shitty little slimfan so things get a bit hot if I’m stuck in traffic or something, the coolant can get up to 210-220deg without the stock gauge even flinching.