Awesome car!!! I love the Carbon Fiber hood. I was looking for one at one time, but now I realize that with the setup I’ll be running, I need all the weight I can get above the front wheels. ![]()
My phone has been down a few days so I haven’t really updated…i’m hoping to have everything squared away by this weekend. In the meantime…I have my axles out and shift linkage all disconnected.The motor is finally ready to be pulled for the first time ever since the factory. I can honestly say that I’ve broken almost every single hose that that I’ve removed from dry rot and sheer age. Anyone know if I can eliminate the purge can in the passenger corner by the ABS module? It has some flying saucer looking thing coming off it. I can’t really figure out exactly what it does.
OK, well I’ve been shaving the bay for the last 2 weeks. It’s a heck of alot more woprk than I anticipated, especially since I suck at paint and body work. It’s coming out ok I guess. I’ll post up some pics of the progress as soon as I can.
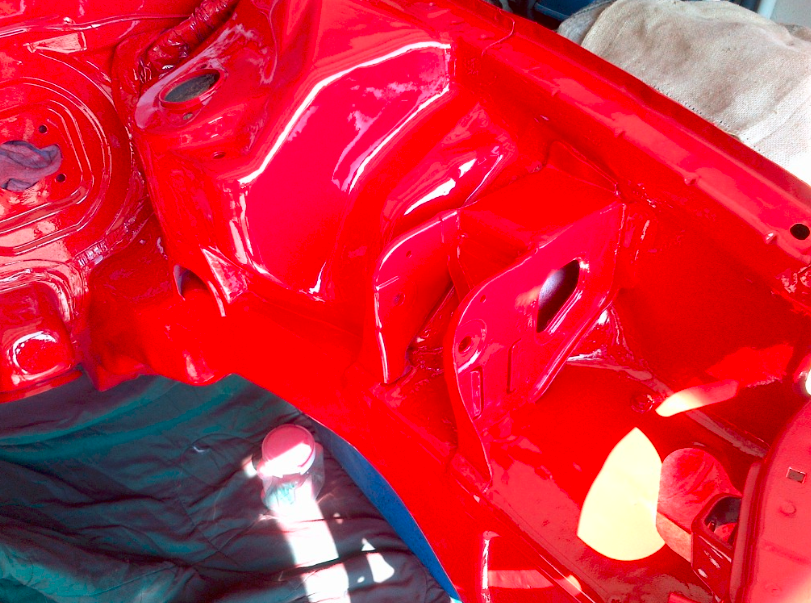
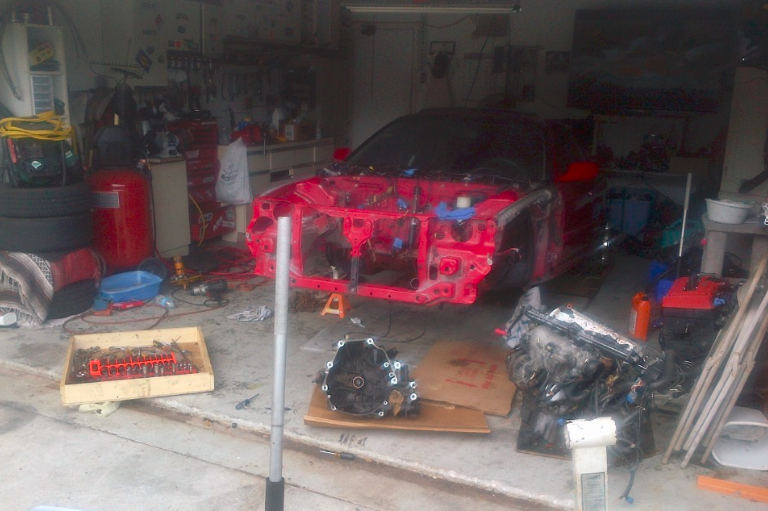
Well, here I am 3 weeks after I started and I finally have the bay all shaved and painted. It actually came out far better than I anticipated. It’s not show quality but it"s a far cry from where it was before I started. Here are a few pics of the progression: This is before I started…it needed a good degreasing and pressure cleaning.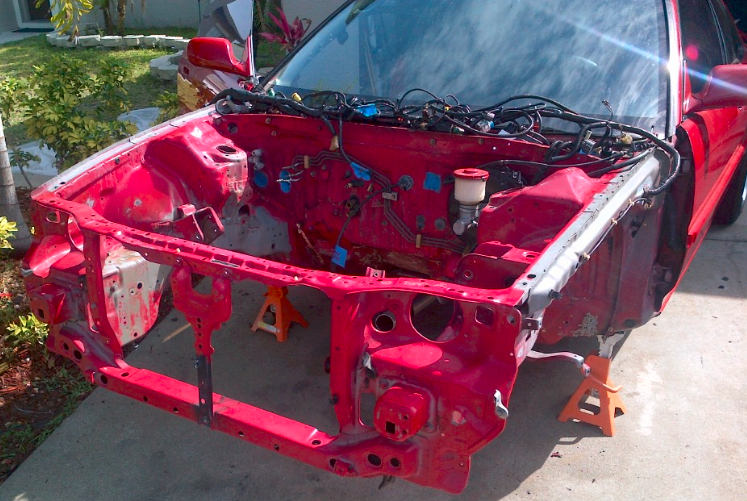
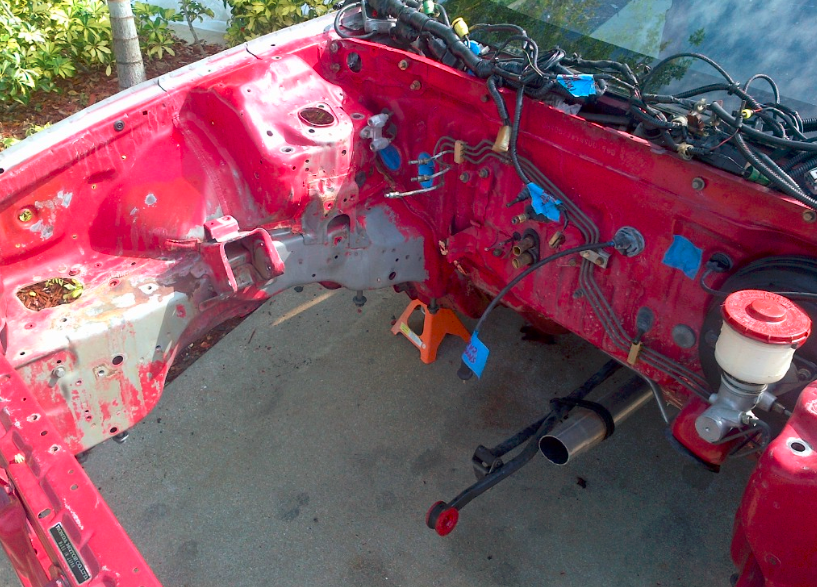
here you can really see how the nasty viscous ABS fluid has just destroyed the passenger side engine bay paint.
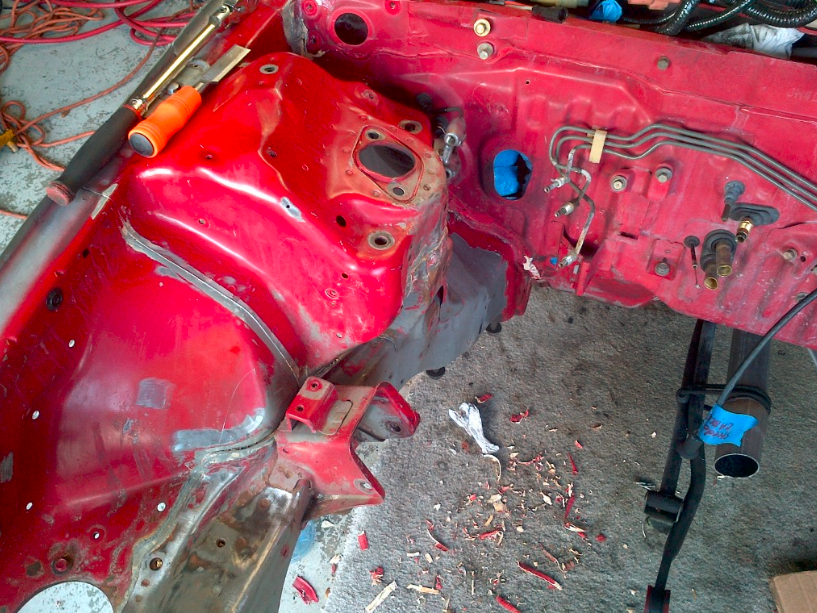
Here is one of me removing all the seam sealer. It comes off pretty easy. I had to get it all out of the cracks…I used all sorts of methods. The orange handled chisel worked best for the bulk of it.
Show a current picture!
Glad to have been able to give some helpful advice on your FB threads.
I agree, its so much more work than you anticipate before starting. I’m looking forward to these after pics! ![]()
WOW! Very Clean! I’m Super jealous! Did you do a wire tuck?
Hey sorry guys…I’ll post up a few of how it looks now after paint and then show a few more later of the whole process. I pinched something in my neck pretty good trying to re-install my brake booster so the last few days have been suckin’. Anyone who has done a brake booster removal or installation understands how that’s even possible. If you’re on the FB forum, you might have seen these already.
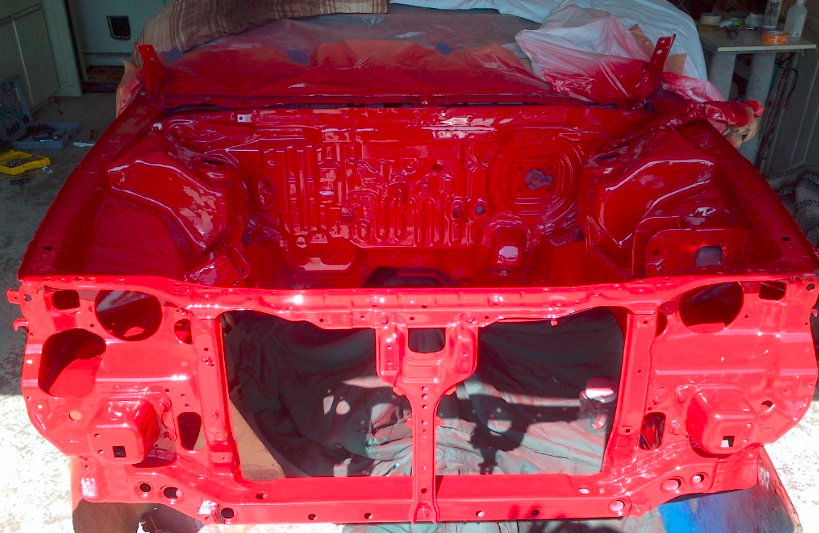
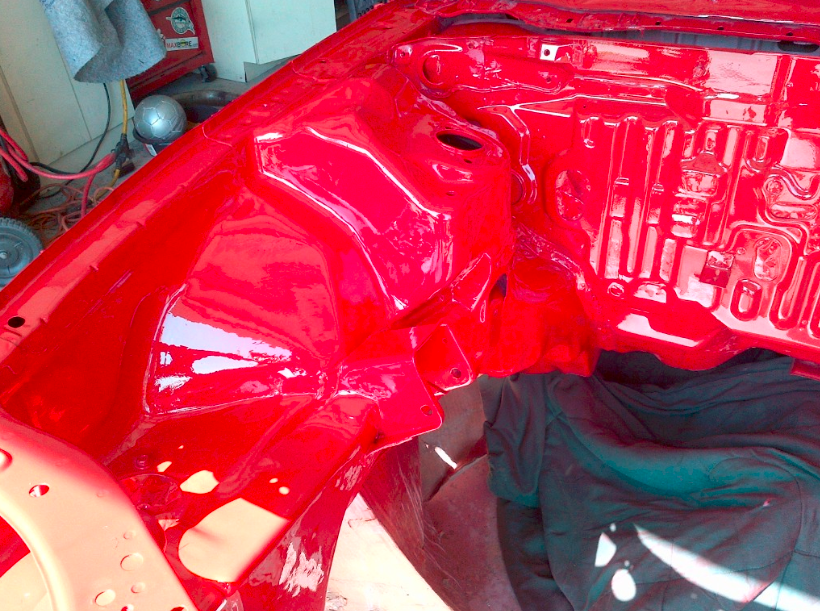
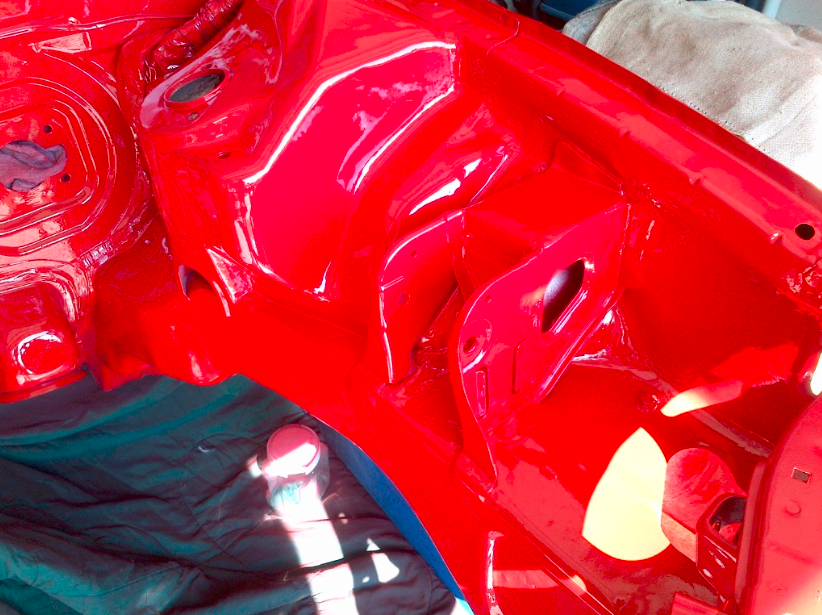
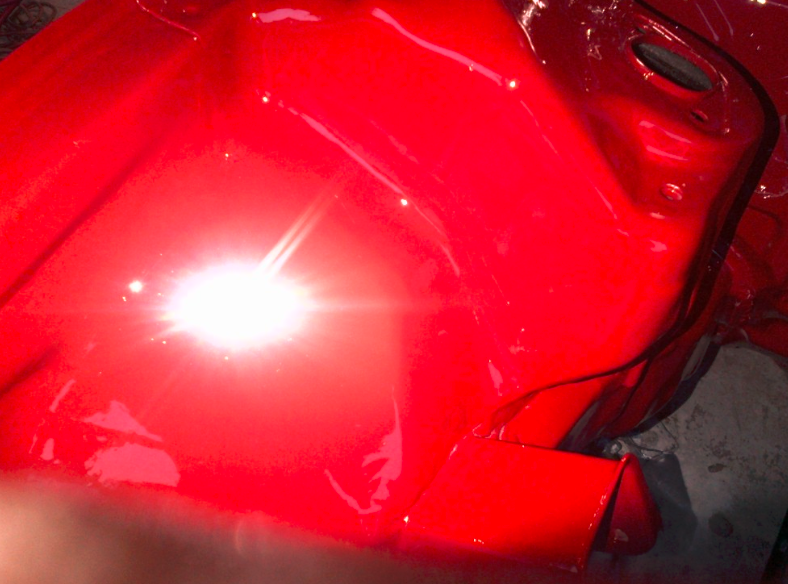
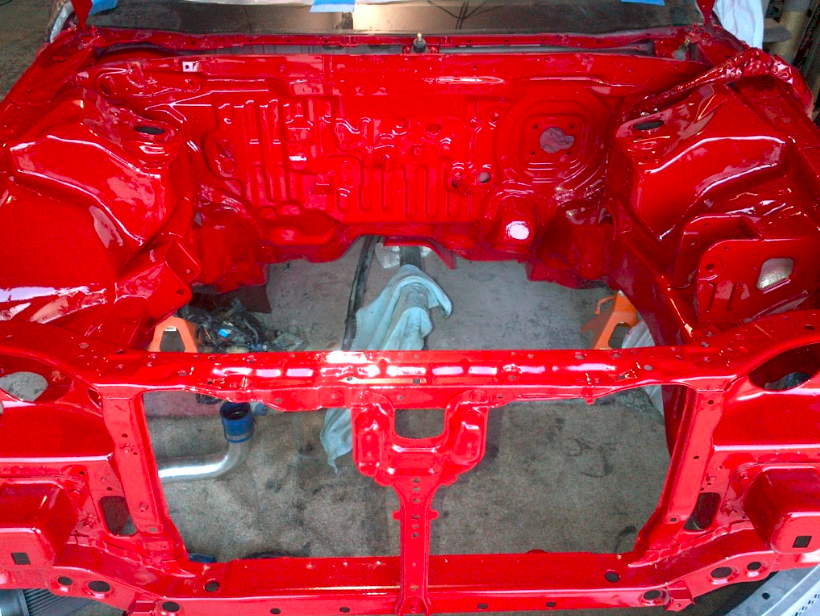
It didn’t come out what I would call perfect, but certainly better than what it was. I got a lot of help from some guys on the FB page for 2nd Gen Integra’s. Later on today, I’ll post up a few of the actual process. I never sanded down so much in my life…it was just basically 3 weeks of sanding, priming, fixing imperfections, sanding some more…more filler primer here, metal glaze there…more grinding, then…yep, you guessed it, more sanding. Finally…i got a tip to try wet sanding with 400, then wet sanding with 600, then washing down, drying, and a good tack cloth…did the trick. I thought it would be too smooth for the paint to stick, but I was way wrong…paint went on perfect. First a really light ‘dust’ coat, 10 minutes later…a standard ‘cover’ coat. Last, a really heavy, (like just before dripping heavy) finish coat. This really made the gloss come out nice in the PPG Single Stage. The key was good quality paint. Color is the OEM R-81 Milano Red. Thanks to Colin Len for talking me into that. ![]()
Looks good! 3 weeks is pretty fast if you ask me, but I guess I’m just a snail. Good work!
Any particular reason you chose to use single stage paint? Just curious.
Job well done!
Nice job! Body work is such a bitch.
[QUOTE=rollinmyda;2314222]Looks good! 3 weeks is pretty fast if you ask me, but I guess I’m just a snail. Good work!
Any particular reason you chose to use single stage paint? Just curious.[/QUOTE]
To be honest…I have very little experience with paint and body. I asked the guy at the paint store what I should use. He said that this single stage is the best stuff because if you lay it on there properly, it shines up really nice. He also turned me on to this new stuff on the market that he was just raving about. It’s a High Temp Top Coat Hardener that mixes in with the reducer. He said the stuff works great, he was right. I just mixed it like he said, (4:1:1) and painted it like he said, dust coat, cover coat, super heavy coat with no more than 15 minutes in between each coat. Came out like you see. I was actually surprised.
Albeit, I did spend nearly 2 full evenings doing research on how to use a HVLP gun, and how to set it up w/ the right air pressure, blah, blah and set the flow so the pattern looks like a football, etc, etc. I really just kinda took my time and tested a few things to see how they came out…I will say that at first, I kept getting like little air bubbles or something in the finish on my test sprays, turned out, my oil\water filter was saturated and not doing it’s job. Not to mention, it was too close to the compressor, it needed to basically be at the end of my 50’ hose, inline, just before my sprayer. Once I got that figured out, my test sprays were coming out perfect. I went for it!!
BTW, the gun and paperwork that came with the paint was calling for 8-10 psi at the cap…BS!! I set it to 24 psi and it started spraying perfect. Thanks YOUTUBE!
Well, I’ll be calling Golden Eagle today to get an update on my sleeved B20. I was hoping to hear from them by now.
I think I remember seeing this car over on CI. But just came across this thread… I’m lovin the progress! You are definitely headed in the right direction, I’ll keep an eye on this. Were you able to reach anybody over at GE today? But one thing, looks like that shop raped you on those trailing arm bushings. JHP sells them for $66.50 for the pair. http://www.jhpusa.com/store/pc/viewPrd.asp?idproduct=11372&idcategory=386
Yeah, bastards got me on those RTA bushings…those were the exact ones I bought too. Bad move on their part too, because I have a huge list of stuff I’ll be buying in the coming month’s and that one bad rip off cost them all my future business. I don’t want to just give away my hard earned doll hairs!:mad:
Allright, so here are a few more pics with some more progress. It’s been a bit slow going as I’ve been on a special project at work. Here are a few pics of the bay shaving process…not the best way to do it, but I got the job done.
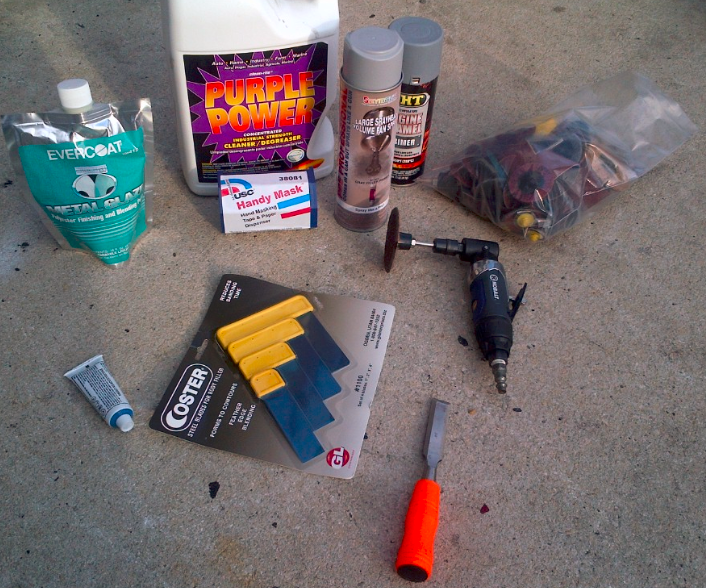
Here’s a few supplies I picked up from Terry’s Body and Paint
First, let’s get rid of that seam sealer.
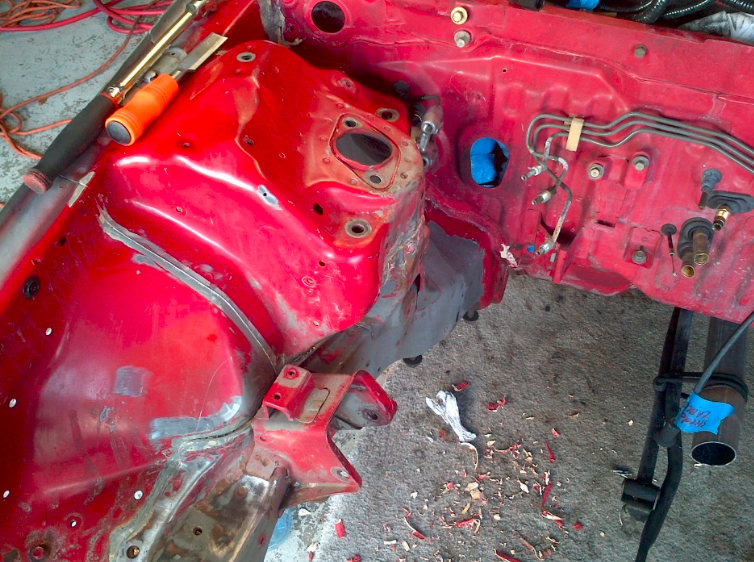
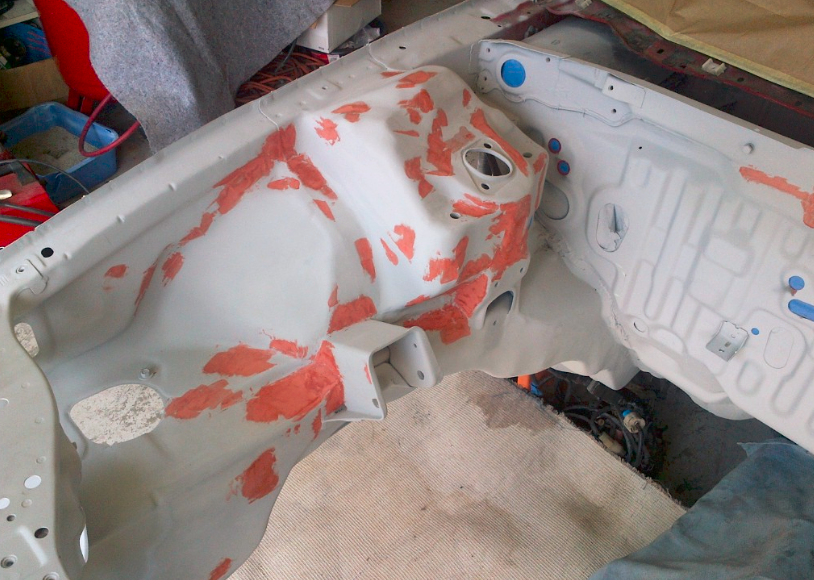
Seam sealer gone…I lay down a nice heavy coat of Self-Etching Primer. I used a dark color so it kinda doubles as a guide coat. I had to grind down quite a bit of surface rust on the passenger side where the paint eating viscous ABS fluid just dripped over the years.
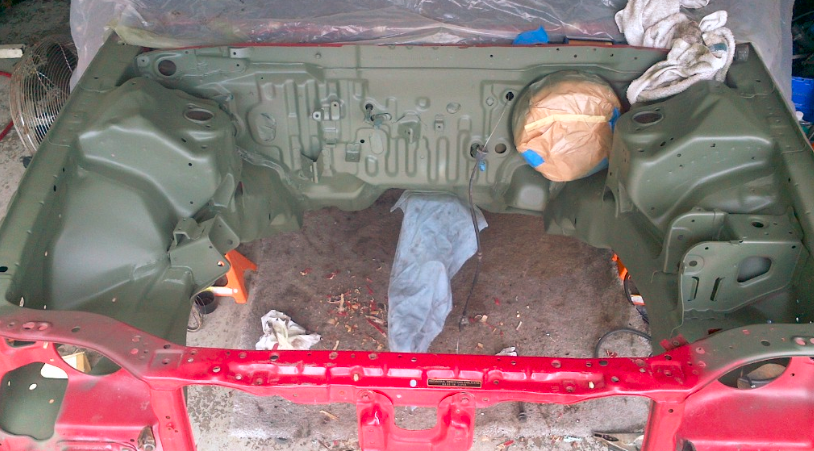
Well, you have to start somewhere, right? Some metal glaze to fill in a few of the larger spots.
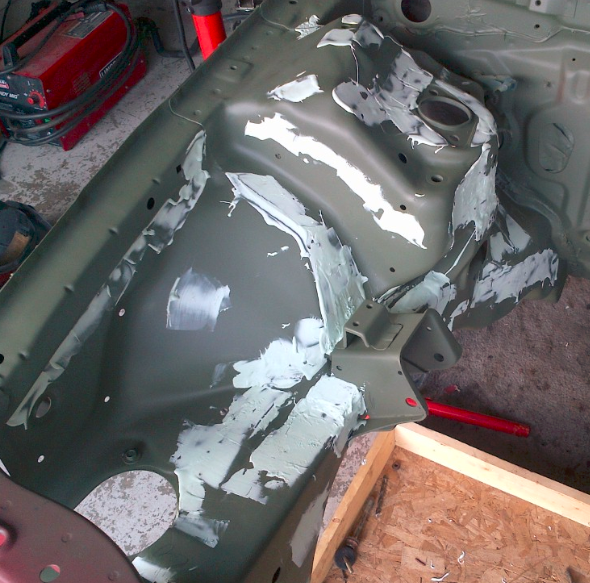
Just so you can see how many tiny little spots there are on this engine bay…nothing like an EK or EG civic.![]()
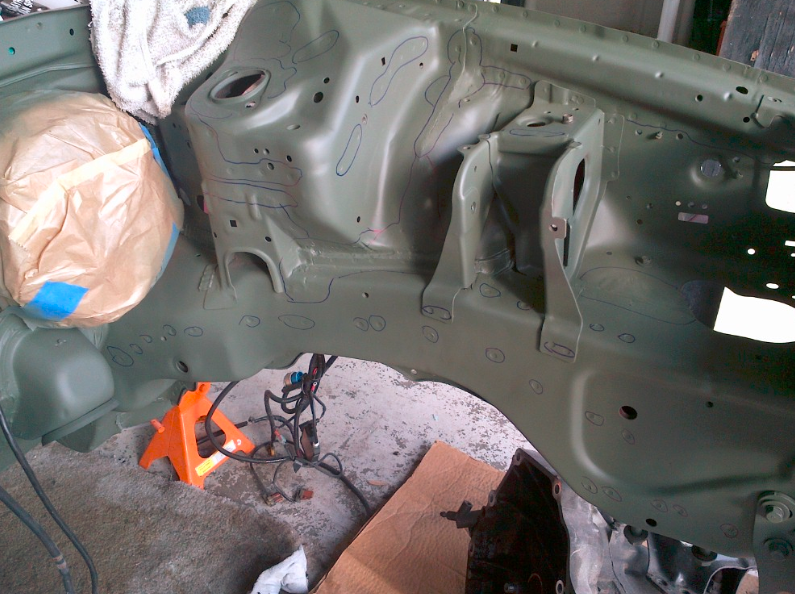
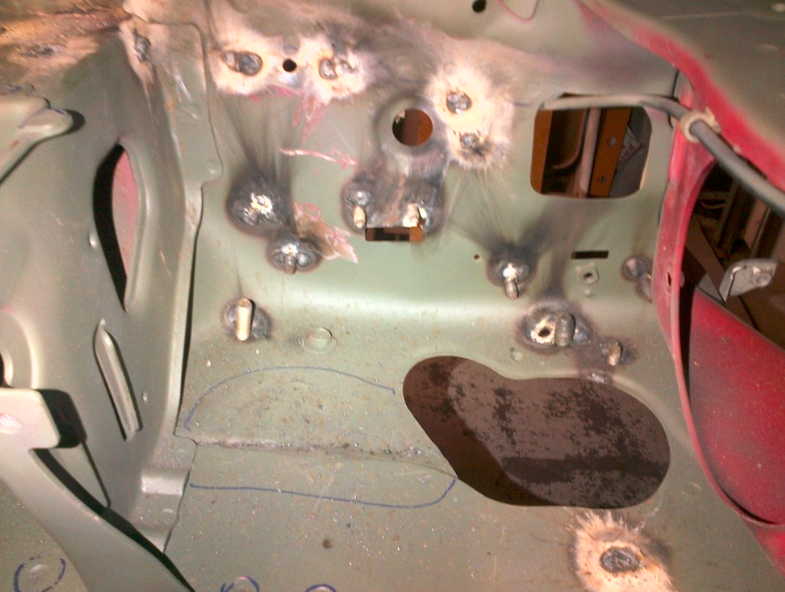
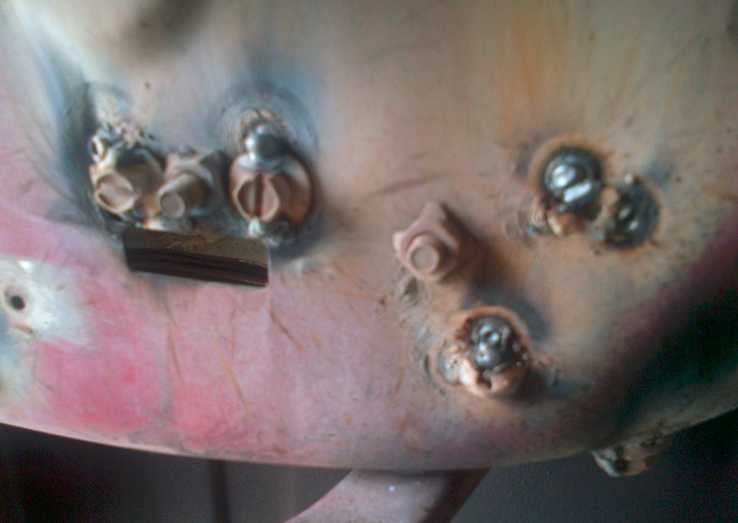
I figured I’d just go ahead and start welding up and closing most of the smaller holes in the bay…some of the holes needed a bolt pushed in from the backside and then welded into place…then I just grinded off the protruding bolt and filled it in with metal glaze. Easy Peezy! :bowthank:
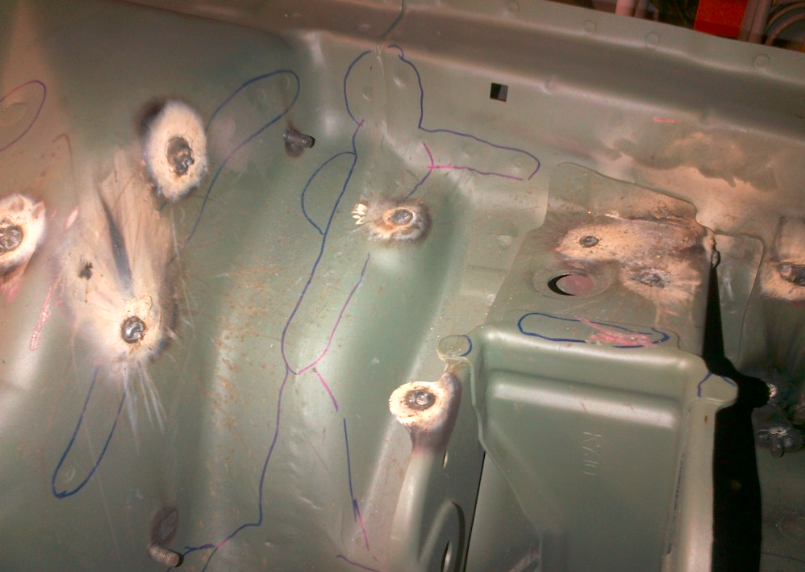
That makes my arms tired just thinking about having to grind down all those welds.
Here’s the other side.
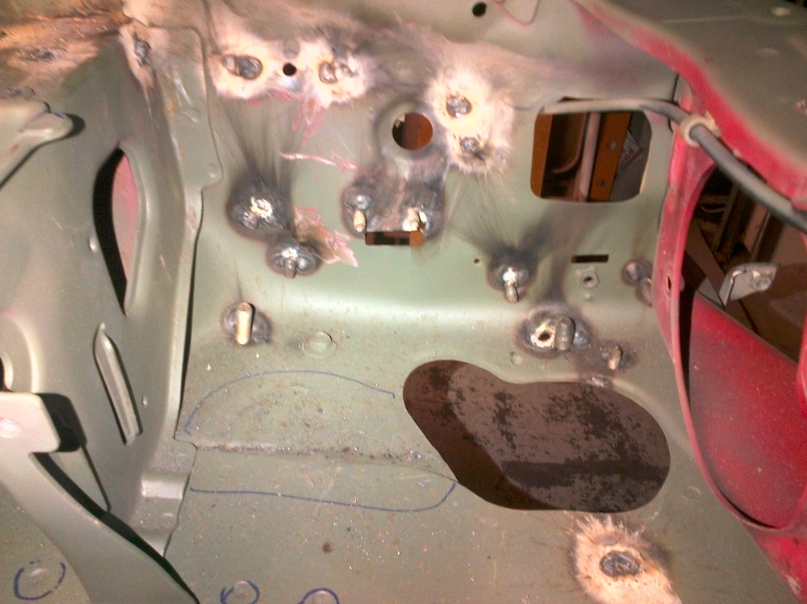
Colin gave me some crap so I just removed the booster, lol
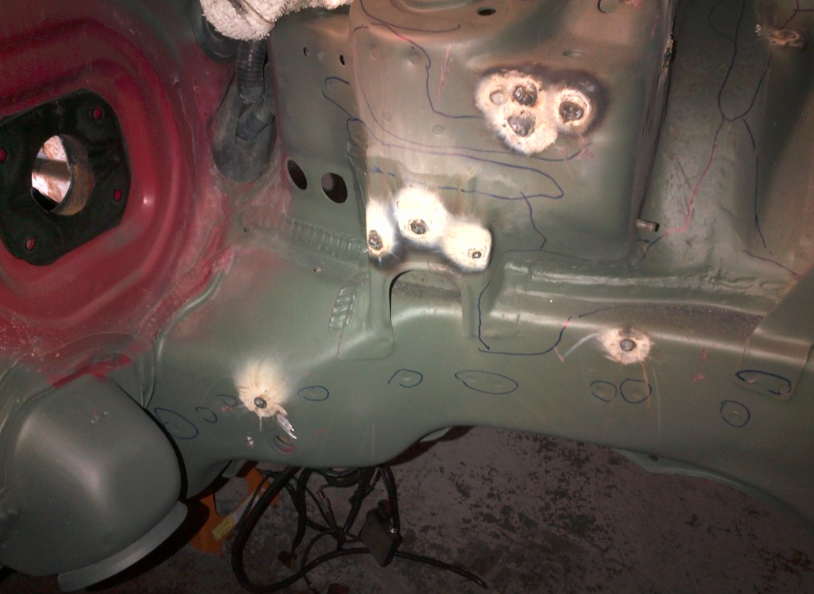
Here’s a shot of all the small bolts that I used…ugly at first…but functional.
here is a grinded down bolt…I think you guys get the idea.
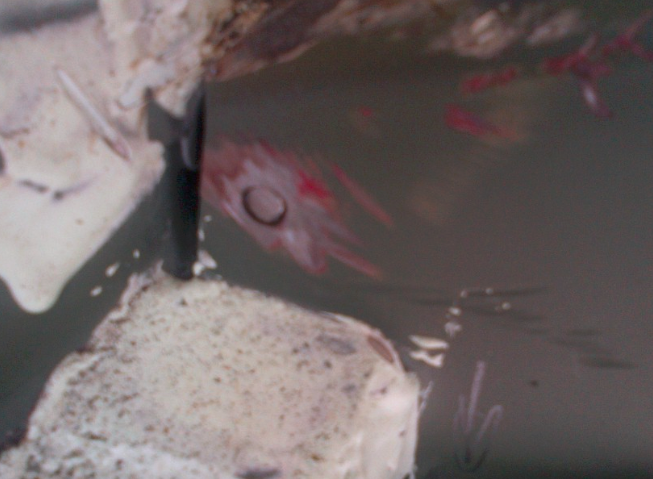
Here it is from the other side to see how I just spot welded the bolt heads in. I’m sure there are better ways, this is just the way I chose to do it.
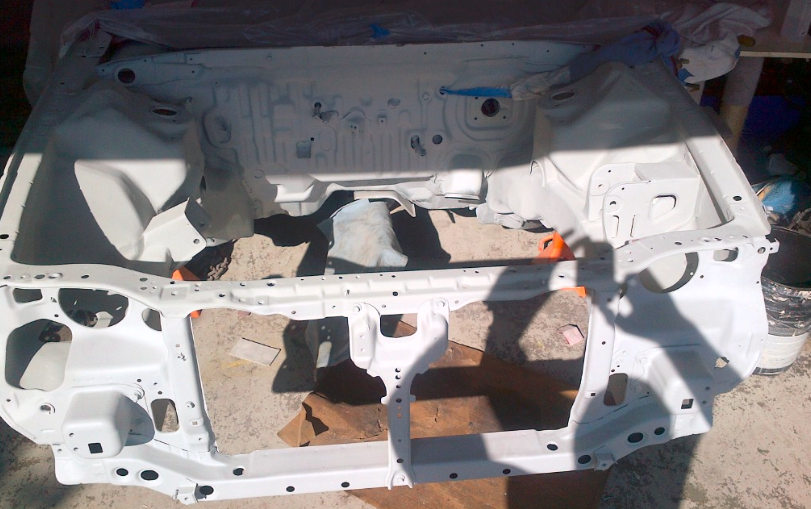
Here is what it looked like after the first phase of grinding, sanding, and more light colored primer. I used a different color on purpose…this way when i’m sanding…I can tell If I start to go too low.
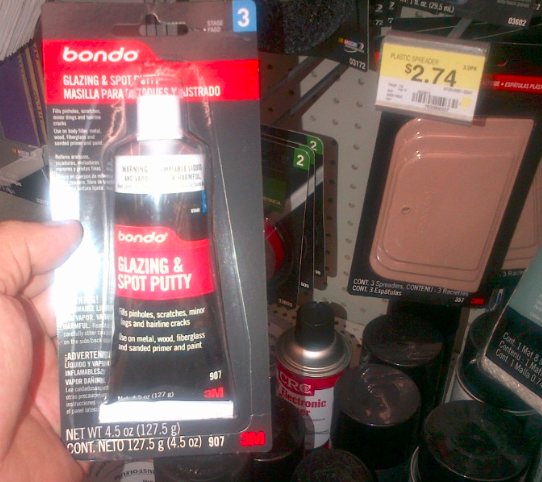
With the lighter color…you can really see all the little imperfections…so I use this stuff. It dries fast and sands easily. it’s perfect for tiny spots or lines that just seem like they’re there to annoy.
seems like the more you look, the more you find.:danger:
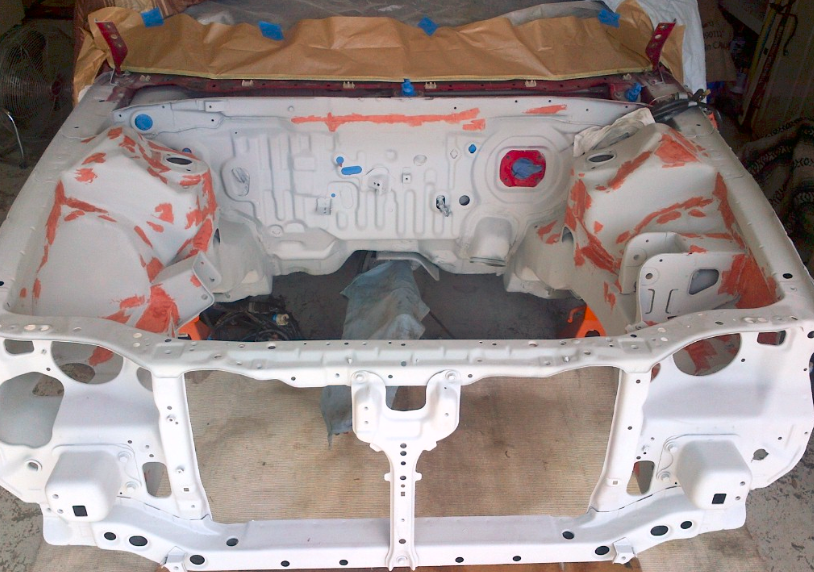
looking back, those spots near the passenger motor bracket sucked!
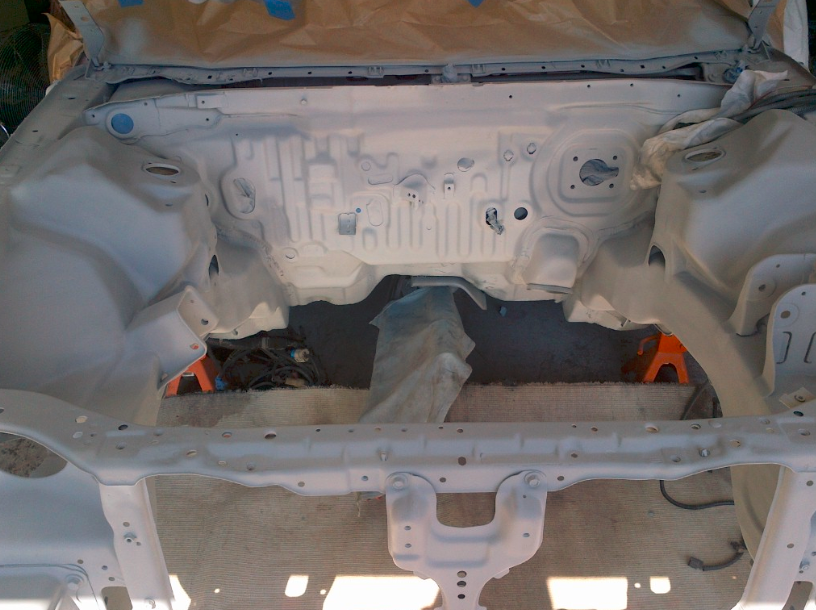
Here it is after more sanding, and more primer…it’s almost ready for paint
LOL! My fat cat Ramsey…She want’s to help. This is how she sits. smh.
And here she is. The first coat of R-81 Milano Red…just the way Acura originally intended…only with more gloss!
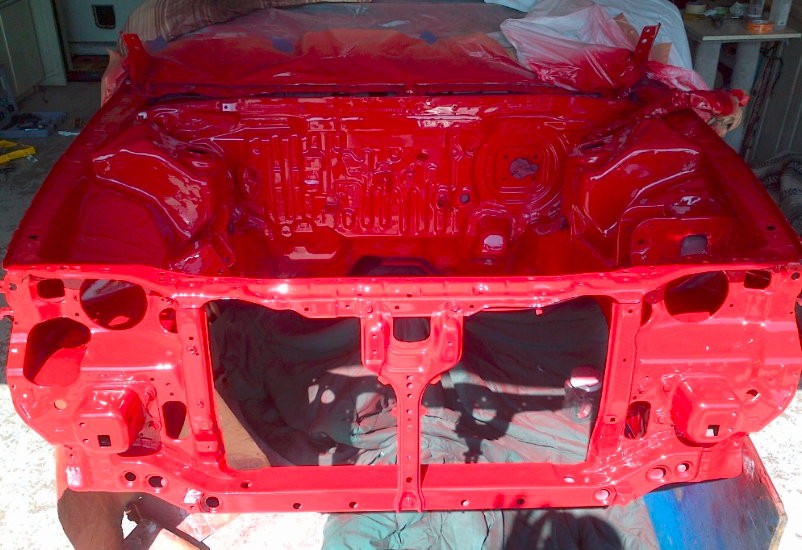
Here is another, this is after the last heavy coat, the following morning.
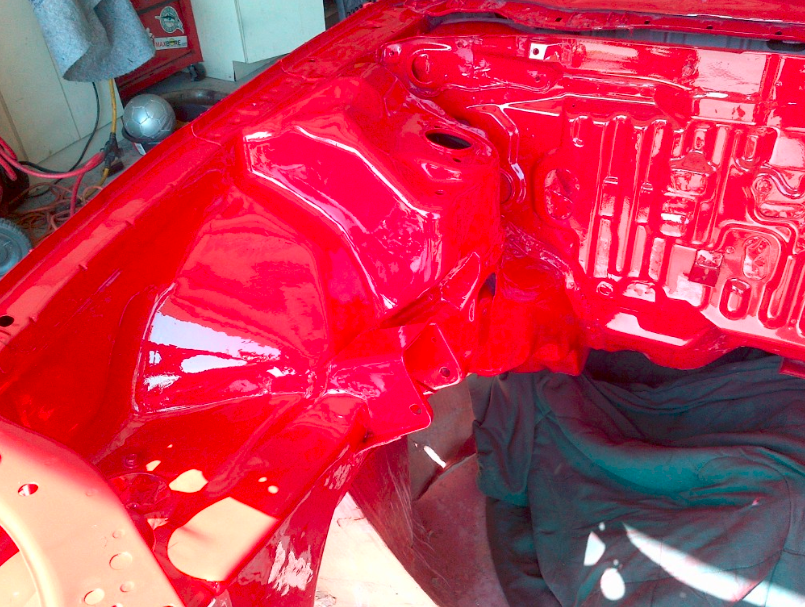
Yeah, yeah…I know. I already posted these. Sorry, I was behind on the progress part so I posted the end result first for those who asked. Deal with it. lol Also, here you can see on top of the drivers side mount bracket…I had to weld a big thick washer from an old OEM strut to fill in the big hole and depression. I wanted it flat so I had to grind the heck out of it. Now it’s nice and flat. ![]()
