Finally Getting My Turbo Set Up Going

Thanks. I like to look at things like if it breaks or needs replacing…it might as well be upgraded.

That’s what I keep telling myself “It’ll be worth it in the end”…as my fingers drip with greasy blood.

Pay someone to do it if you can. Take it all apart yourself, but pay someone to press the bushings in and out. It sucks

Sooo I NEVER want to do this again and hope I never have to (on this car). I’m so over this bushing shit it’s not even funny. I got one trailing arm done and installed back on the car. I also got the new bushings pressed into the rear control arms minus the middle one where the shock mounts. I’m still waiting on those to come in. I got the new front driver control arm in the mail and got the new bushings in that. Went to press the bushings out of the front passenger control arm and the metal sleeve around one of the bushings bent in on itself and then logged itself crooked into the control arm. Did everything I could to try and get it out, but it’s stuck. Going to order a new control arm tomorrow. That will be 3 out of 4 being replaced now lol. Suuuuuucks! I also have a set of EBC rotors and EBC RedStuff pads coming in this week for the front.

Here is the only updated photo I have right now. The rear control arms with the new bushings (minus the middle ones)

Still to do is do the front wheels bearings and ball joints, the other trailing arm, the upper control arm bushings, compensation arm bushings, …ugh I don’t even want to think of what’s left right now. Hopefully, fingers crossed it’ll be done for next weekend.

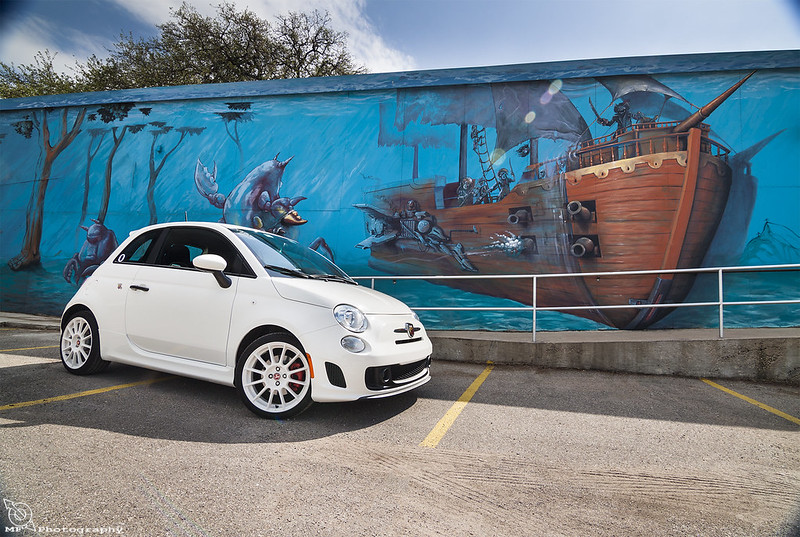
On a side note I took my Abarth out for a little photoshoot yesterday at this cool spot here in Austin.
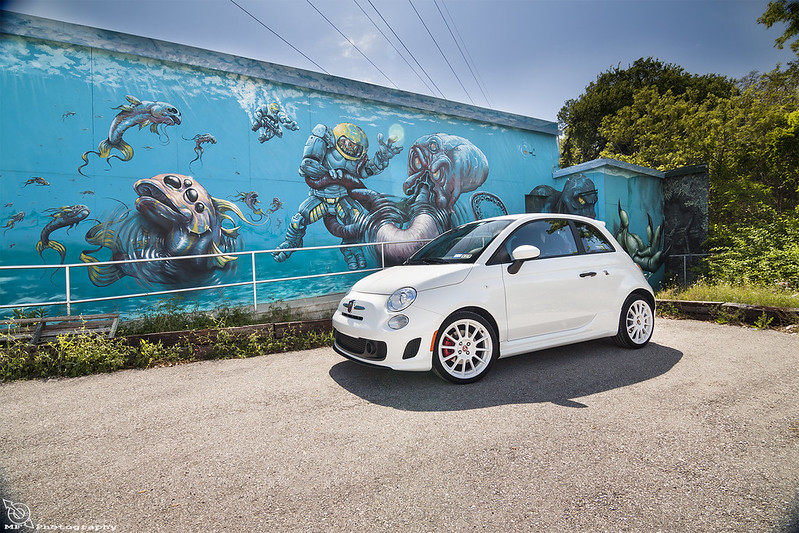
IMG_3553 by Mark Freeman, on Flickr
IMG_3605 by Mark Freeman, on Flickr

The rest of that shoot Mark Freeman | Flickr

maybe i did see it in you previous post. how come you didn’t got with aftermarket LCA?

and can i have your # or email. so i can send you pic of my motor mounts. thanks

markfreeman2010@aol.com

thank you sir.

Np. And I forget to answer your question. I didn’t want aftermarket lower control arms because I don’t trust the aluminum. I know most companies now days use aluminum for the oem stuff, but I just don’t trust the aftermarket junk. I think those things are under a lot of pressure and stress so I feel my car and life is safer with good ole heavy steel

i hear you. but the function7 LCA seem to have lots of great review. myself have the skunk2 had the change the bushing once, other than that its pretty solid. but i do agree with you.

Honestly, the rears wouldn’t bother me as much. It’s the fronts that I wouldn’t trust. Too much is going on with the front to have aluminum down there. The rears just kinda sit there and don’t do a whole lot. Btw, not sure if you sent that email, but I never saw it. Messaging me on facebook might be easier. Redirecting...

sorry i did not take the pics yet. car is at the mechanic for some more work. i will try to take it asap>

thanks

[QUOTE=turboda4dr;2333424]sorry i did not take the pics yet. car is at the mechanic for some more work. i will try to take it asap>

thanks[/QUOTE]

No rush man. I’ve been super busy anyway.

Update on the car. It’s all done and back on the ground. Ran into some problems again getting it done. Car feels like it’s on ice and won’t drive straight at all. It needs an alignment really bad. Will explain everything later

I haven’t had the time to update this in awhile. Seems like that’s the way this always goes. I hate the fact that I’ve got a full time job and go to college. No time for anything these days. Anyway…all the bushings are done finally. I had to tow the car to get the alignment done because it was so far off I could not drive the car. After that was done I finally got to drive the car with all the new bushings and it’s like night and day. The car rides a lot smoother, doesn’t sqeuak…well it does, but I’ll get to that in a second. Overall the car is a lot better with all the new bushings and even though it was a major pain to and I never want to do it again, I’m happy with how it turned out. I don’t really have any photos of it in the process of doing all that. Just didn’t have the time. Oh, the squeak. So all the new bushings are nice and quiet and the new wheel bearings are great. However, my Avid Racing traction bar is a HUGE POS. It squeaks and clunks and drives me absolutely insane. From the research I’ve done apparently all traction bars make these noises and it’s unavoidable due to the heim joints making the noise. I can’t take it anymore cause it sounds like the car is about to fall apart. I’ve still got my stock crossmember so I’m going to try and cut it up as much as I have to (within reason) to make it clear the downpipe and dumptube. That traction bar has been a giant pos ever since I put it on and I’ve always hated it. I’ll make the stock crossmember fit one way or another. That’s a future project though.

After all the bushings were done I moved onto my next two projects. First of which was to redo my headlights. I had cleaned them inside and out once before years ago, but never repsrayed the inside reflective coating. It got to the point where it had all come off and I could hardly see at night so I took them a part again and sprayed a new reflective coating on the inside.

As you can see hardly any coating left on the inside

After I sprayed a new coating inside

The lenses were also really cloudy so I cleaned those as well wet sanding with 2000 grit and then using polishing compound

Much better after the cleaning

I can finally see at night again =]

Oh also got the new EBC Redstuff brake pads since I had to return the other ones cause they didn’t fit. The car finally stops! =] So much better than the autozone pads I was on lol. They squeak a little when they’re cold, but oh well

The other project I did was cut the Greddy bov flange off and weld on this Tial flange. I didn’t weld it cause it suck at welding aluminum, but I had my coworker do it

I had some issues with the Tial causing compressor surge with the 11lb spring so I went down to the 10lb and it was still doing it. I had to use a bigger vacuum line from the bov to the manifold and that seemed to eliminate most of the surge. I’d like to try a 9lb spring and see how that does. Overall it sounds way better than the old Greddy sounded.

I’ve got more stuff planned for it, but need to save some money now that all that is done. Will post back again when I do more stuff

heat wrapping intercooler piping is a no no, it is made to keep heat in… the aluminum tubing is meant to dissipate it… but it does look neat lol

Makes absolutely no difference. Drove around last week without the wrap on there and my intake temps were identical. It keeps heat in hot things, keeps heat out of cold things. Doesn’t hurt anything and makes no difference what so ever on intercooler piping

So finally decided to do something about the awful traction bar on this car. I’ve always hated and now that all my bushings are new and I still have to listen to it clunk and squeak…It’s time to throw it in the garbage. I took the stock cross member and modified it to clear my downpipe and dumptube.

Cut it up with a plasma cutter


click image upload


screen shot windows

I then bolted it on the car and marked with tape where I needed to modify it further to clear everything


free upload


uploading pictures


gifs upload


free photo hosting


picture uploader

I then welded in some thick sheet steel to brace it so it wouldn’t flex and I left open a small section to clear the dumptube and radiator drain plug


image hosting no account


image share

Then I painted the whole thing so it wouldn’t rust and it looks new again =]


windows 7 print screen


upload a gif

Next step is to go bolt it on the car with the new Energy bushings for it and be happy to finally throw the Avid Racing traction bar I’ve been using in the trash!

What don’t you like about the Avid bar?

surely all that plate welded back in becomes redundant if you leave that cutout? leaving a weak point like that will flex, bend and break in no time

The heim joints make a terrible noise. They squeak, creak and pop every time I stop or set off. I hated hearing it because it sounded like my car was falling apart. I can deal with my loud exhaust and vibration from solid mounts, but that bar was just too much to deal with. Now that the stock one is back on with good bushings it’s so much better. The car has zero squeaks and handles like it’s supposed to again. That traction bar always made the steering wheel feel like it wasn’t connected to the front wheels. Hard to describe. I’m waiting on someone to come get it for $20, if he doesn’t come by soon I’m throwing it in the trash with a giant smile on my face.

It’s solid for now. My friend and I tried twisting it and setting it up on boards and standing on it trying to get it to flex and it wouldn’t move. I’d imagine it’s just like cutting a hole in a wall for a window. The hole is there, but the structure itself isn’t really weakened in any significant way. I’m no engineer though. So guess I’ll see

I took some more cell phone shots the other night. I need to get out and get some real photos again, but just haven’t had the time. Unfortunately this 3 day weekend got turned upside on me. My best friend totaled his bike and got pretty messed up from not wearing a jacket. He’s alright other than some massive road rash. He was extremely lucky and his helmet did it’s job. I spent the weekend with him making sure he was alright and although the bike is lost he’s good so that’s all that matters. I will NEVER own or ride a bike in my life. I’ve always said they’re death traps and I have a massive amount of respect for people who ride them all the time. I just don’t have the nerves for that. Anyway, onto the photos of my car. Oh, I finally made an instagram even though I’m not a big fan of it. Username is albino_pikachu (the nickname a friend gave my fiat)

IMG_20160529_204242 by Mark Freeman, on Flickr

IMG_20160529_201124 by Mark Freeman, on Flickr

20160529_201143 by Mark Freeman, on Flickr

20160529_201157 by Mark Freeman, on Flickr

IMG_20160529_201333 by Mark Freeman, on Flickr

20160529_201214 by Mark Freeman, on Flickr

20160529_201232 by Mark Freeman, on Flickr

And my two shots of my daily I took over the weekend as well

IMG_20160529_125210 by Mark Freeman, on Flickr

IMG_20160529_200815 by Mark Freeman, on Flickr

UPDATE TIME! =]

Decided to redo my dumptube out of titanium cause I was bored and I happen to have easy access to that material thanks to Ticon Industries being right down the street from my work. I bought a 2ft piece of 1.5" titanium tube and a slip fit joint. I made some stainless steel pie cuts to weld onto the wastegate flange and then welded the titanium tube onto the slip fit which slipped over the stainless (can’t weld titanium to stainless) and then welded on some tabs for springs to hold the slip fit onto the other piece. I also decided to route it out of the hood this time instead of down towards the ground. I figured my hood is dented anyway and everyone knows it’s boosted now. No point in trying to keep it a sleeper. I didn’t take any photos as I was making it, but here are the photos of it all done

The hardest part of making this was figuring out where the hole in the hood needed to be and then getting that hole the correct shape. That was not fun and took hours to get right. We also covered the hole with a round piece of carbon fiber to make it look ascetically pleasing. Fun fact, the piece of carbon I used was cut out from the GTR hood that flew off at the TX Mile at almost 200mph (1320 posted a video of this awhile back). It was a gtr that my work built so we had the hood sitting there. Figured I might as well use it.

My friend cutting up my hood

20160604_161451 by Mark Freeman, on Flickr

This was before I cut the tube

20160604_111212 by Mark Freeman, on Flickr

20160604_111223 by Mark Freeman, on Flickr

You can see how the springs hold the slip fit onto the stainless part

20160604_111217 by Mark Freeman, on Flickr

This is how it looks once I cut it and my friend burnt the tip blue (by burnt I mean heated it up with a torch)

20160604_191551 by Mark Freeman, on Flickr

20160604_191544 by Mark Freeman, on Flickr

20160604_191541 by Mark Freeman, on Flickr

IMG_20160604_191723 by Mark Freeman, on Flickr

FB_IMG_1465091155215 by Mark Freeman, on Flickr

This is how it looks with the hood closed

20160604_191936 by Mark Freeman, on Flickr

20160604_191929 by Mark Freeman, on Flickr

20160604_191922 by Mark Freeman, on Flickr

I went out and had some fun in Mexico last night and got to see some nice flames come out =] We got a few of them on video which I will post once I have them. It’s also a lot louder now than before, but I don’t mind that at all. It was a lot of fun to make as well as a lot harder than I thought it would be. Definitely worth it in my opinion. I couldn’t be happier with how it looks.

Side now here is a photo of how the engine bay looked when I bought it, to how it looks now

Then & Now by Mark Freeman, on Flickr

Nice work :getsome:

great work as usual sir.

Thanks guys

Got a little snapshot of the flame coming out.


image hosting no register